Building prototypes is fun but can be a huge time sink. Hunting around on the board–how many 10k resistors are there? where is R15? ugh.
Thankfully, Colin O’Flynn created an program to help you while you’re acting as a meatbag pick and place machine. MeatbagPnP is a python application that takes generated placement files and an image of your board, to show you what goes where.
where does this cap go?
I made a few additions to make it awesomer still, including KiCad support, the ability to see clusters of identical parts and a few other nifty things.
all caps with the same value
You can see it in action here:
New Features
I added a few features I needed myself, namely
- support for KiCad position files;
- support for command line arguments;
- resizing of the component marker (+ and – keys); and
- display of all components in a family (all the parts with the same value, e.g. all the 100n capacitors).
Hopefully, these will be pulled into the main source, but they’re available now on my github fork of meatbagpnp.
Using With KiCad
The main reason I started mucking about in the source was to add KiCad support. The program now imports KiCad-generated fabrication output. All you need to do to use meatbagpnp with KiCad is:
Set an origin
You need to tell the KiCad layout editor where your 0 will be for the positions. You do this by sticking a “Drill and Place Offset” in the lower left corner of your PCB: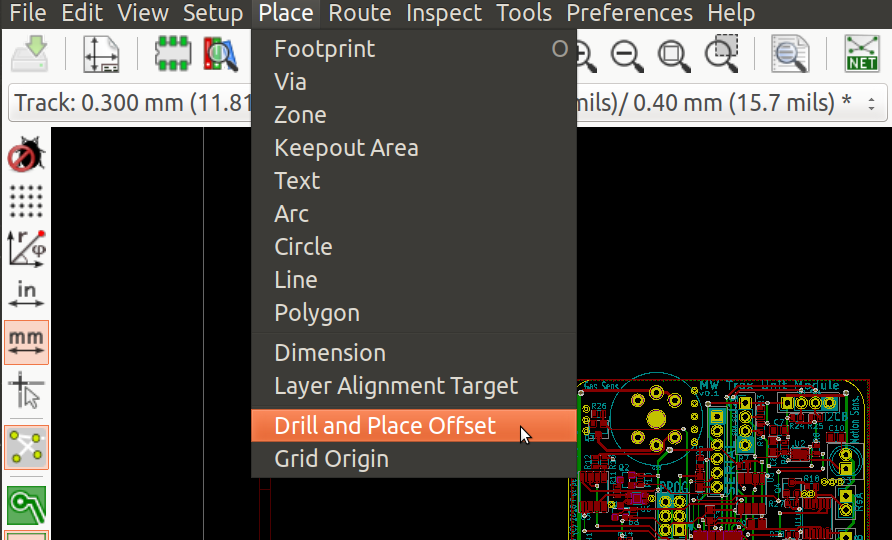
Also, figure out the exact dimensions of your PCB. Be precise.
Export Footprint (.pos) File
Still in the layout editor, export a placement file.
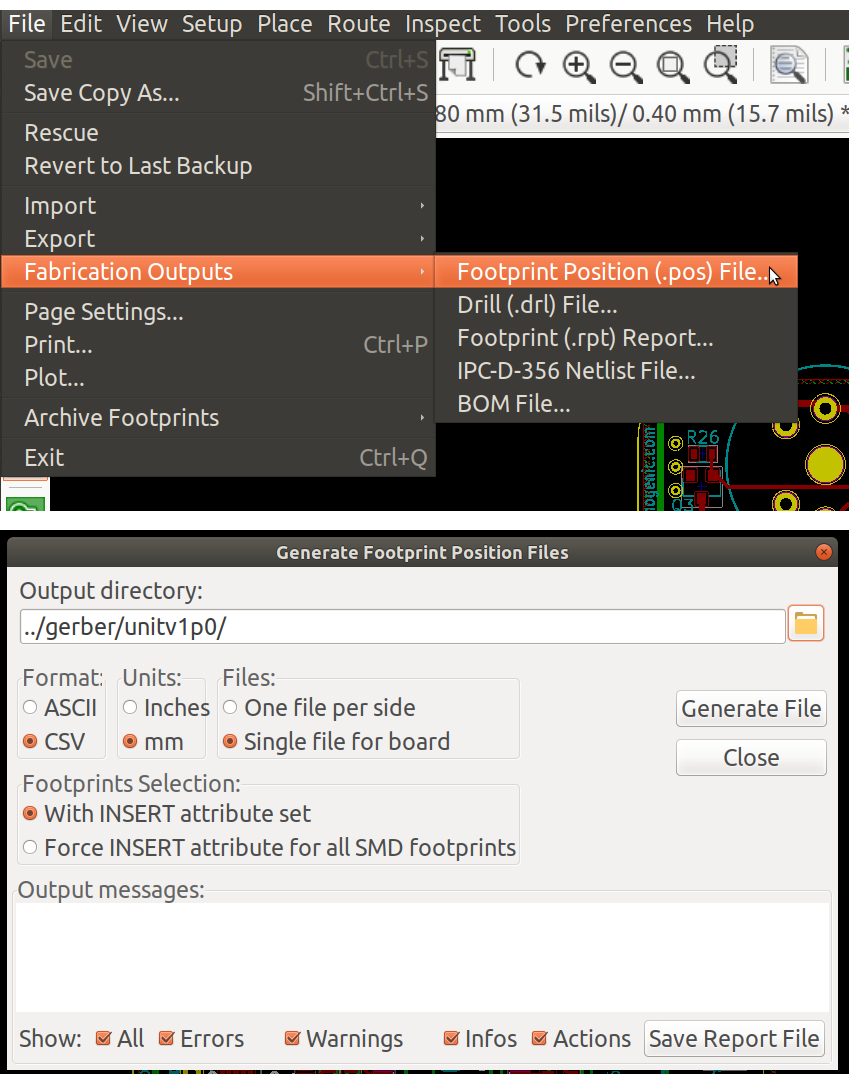
Select the CSV format and Single file for board. Use the same units as you did when determining the PCB’s dimensions, of course.
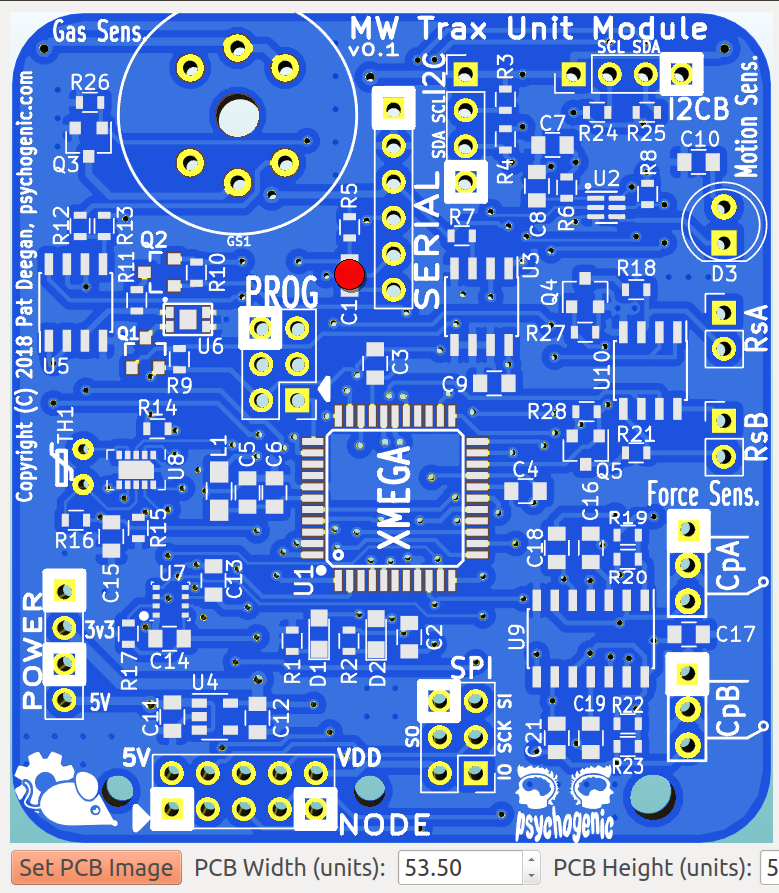
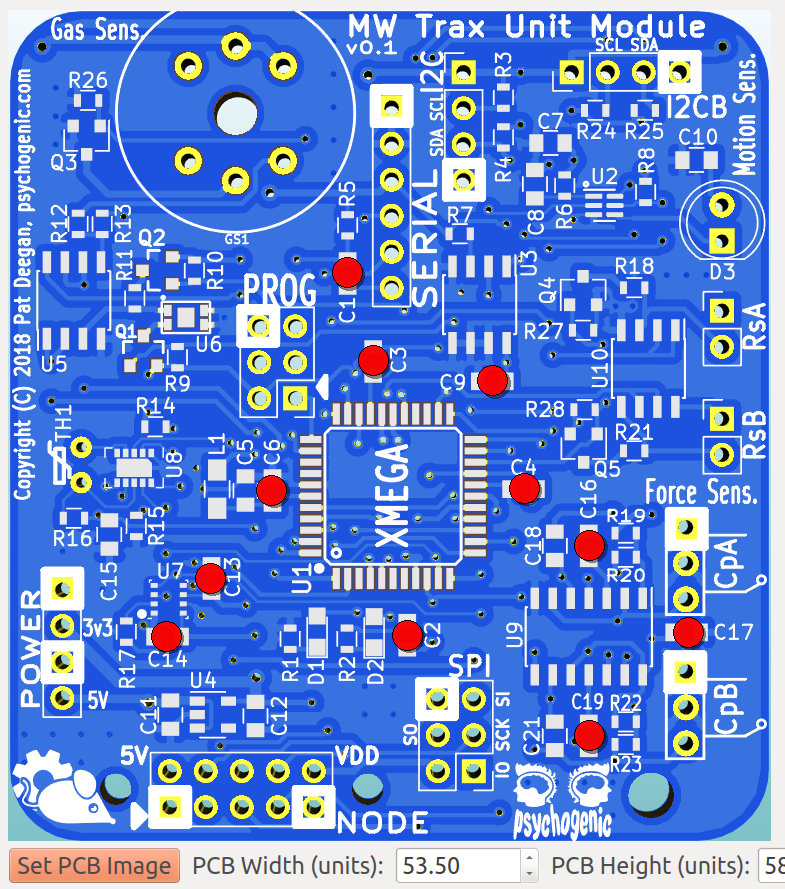
Generate an Image
You need a PNG image of the PCB. This can be anything, really. I’ve used gerbview and exported that, or the 3D viewer. It could even be a picture of the actual PCB.
It doesn’t matter, as long as the image is dead on–there shouldn’t be any perspective–and that it is cropped such that only the PCB is within the image. MeatbagPnP scales the dimensions assuming only the PCB is present within the image, with no margins, at least on the bottom left.
Setup MeatbagPnP
The application needs to know about your files, their format, and the dimensions of the PCB. The easiest way to do this is on the command line. There’s online help, to act as a reminder:
./meatbag.py --help
usage: meatbag.py [-h] [--csv CSV] [--format FORMAT] [--width WIDTH]
                  [--height HEIGHT] [--image IMAGE]

MeatBagPnP

optional arguments:
  -h, --help       show this help message and exit
  --csv CSV        CSV file to use
  --format FORMAT  CSV file format (altium|kicad|eagle)
  --width WIDTH    PCB width
  --height HEIGHT  PCB height
  --image IMAGE
If you’re using KiCad you must at least use the –format option. The demo included with the source can be launched as:
./meatbag.py --format kicad --image demo/Kicad/kicaddemo.png \
   --width 53.5 --height 58.5 --csv demo/Kicad/demo-all-pos.csv
Or you can use
./meatbag.py --format kicad
and enter the rest of the info through the GUI.
Start Using It
You can download it here: https://github.com/psychogenic/MeatBagPnP
I hope this program and my additions help you save time and energy better spent on acts of creation. Enjoy!