
Though most of my projects wind up with their own regulators on-board, the breadboard is the go-to of choice when it’s time to just try something out. Since pretty much everything I play with needs juice, this will be a little review of some of the options I’ve used, and what I’ve learned in doing so. Here are the options I turn to these days:
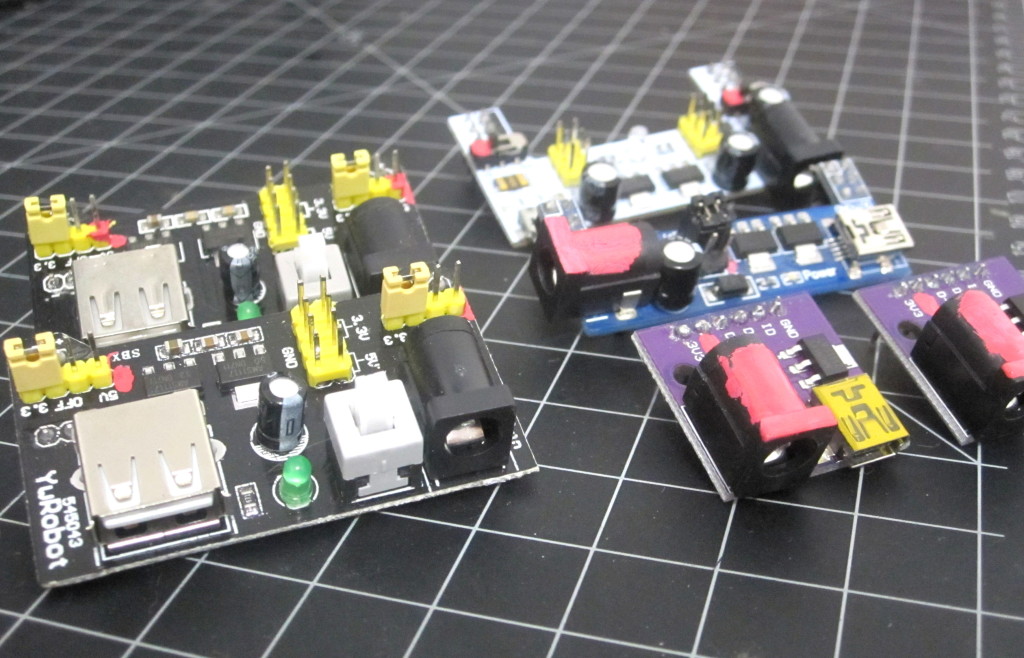
If you’re acutely discerning, you may have noticed some red blobs in the image above… I’ll get into the deets, but the short of it is that, attention being a limited resource, when it’s getting late or you’re deep into the details of the task at hand, one misstep and you may wind up with a fried prototype. Not so cool. So I have a tendency to make anything potentially dangerous eminently visible, hence the blobs.
YwRobot (or not?) Supply
I’ll start with my all around favourite: the YwRobot breadboard power supply. I got two of these in a single order and one of them has the label blackened
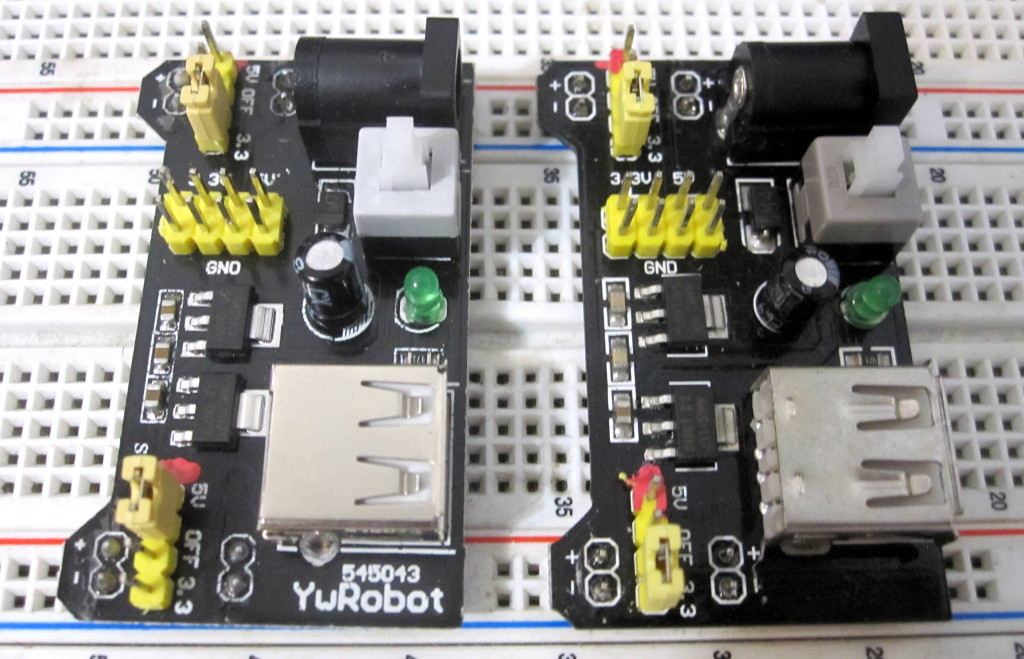
Knock off, perhaps? In any case, these things are great. The main reasons I like them are
- they work as advertised, and do so well;
- they have two independent levels, for the left and right rails;
- they have an on-board push-button on/off switch;
- they have a USB A port, so you can power USB devices in addition to your breadboard.
When I say they work as advertised, I mean that when you select 5V, they actually output 5V! You might think this pretty standard behaviour, as I did once upon a time, but the fact is that not all of these modules actually do this.
The only potential downside is that you must use a barrel jack DC supply to power them (pretty sure they’re all 2.5mm jacks, haven’t measured). It’s my preferred option, but all the other options allow you to power from a USB plug (mostly mini B), whereas this one has the USB A supply port instead.
Since I like to know when I’m using “high voltage”, the 5V side of the selection jumpers has my trademarked red blobs (5V is often high voltage with my projects, which are usually at most 3v3).
All in all, if you’re buying only of my list here, get this one.
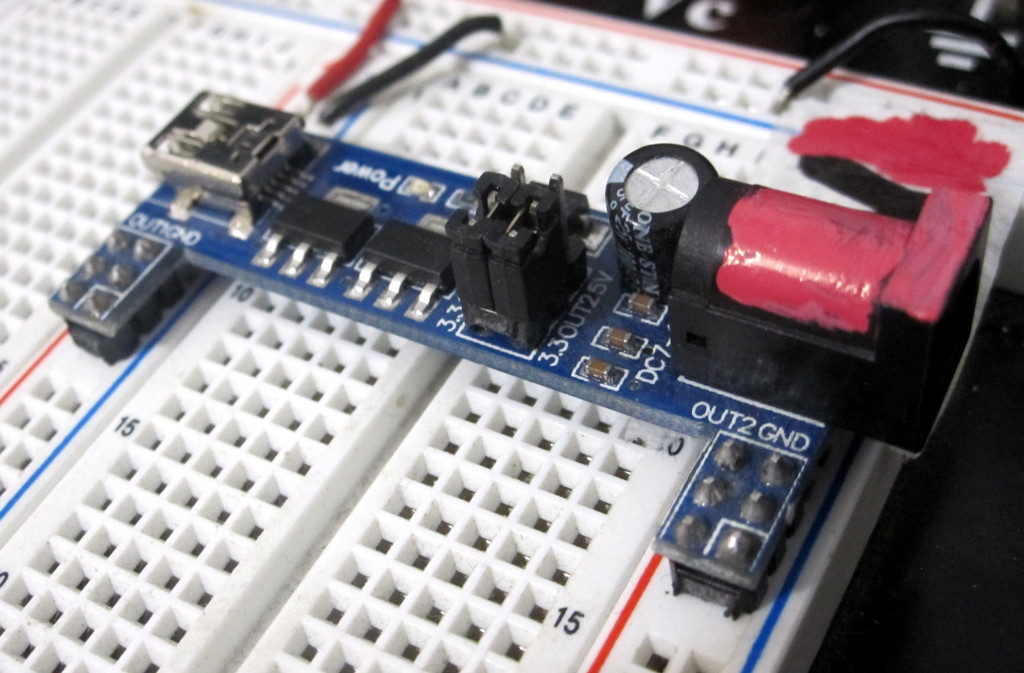
CJMCU Mini B supply
This next supply is different than most as it isn’t designed to fit in the power rails of the breadboard.
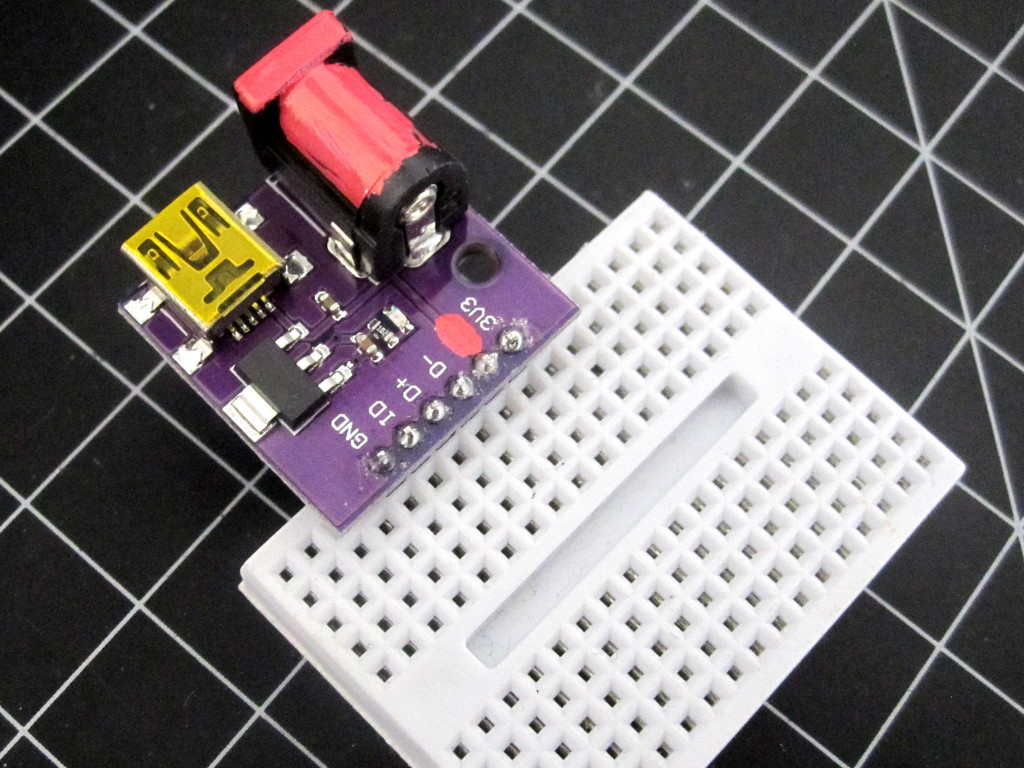
Instead, this module breaks out the pins on the USB mini B plug, so you can access D+/D- and ID, while regulating down to 3.3V. It’s great if you need access to those, or just want to stick it on a small board as shown.
The main downside with this one is that it has an outright lie on the silk screen: what’s under the red blotch, there, used to be 5V. While that may be true if you’re powering from the USB input, what it should have indicated was Vin. If you plug a 12VDC supply into that jack, that’s what coming out. Cue arm-waving robot: danger!
So I blobbed the barrel jack. Still, this module gets regular use.
White Micro B
Next up is the “white micro B”, so named because it has 0 markings and for reasons that should be obvious by looking at it:
The upsides of this module are
- it actually regulates your input down to 5V or 3V3;
- it’s the only one with a micro B USB input;
- it uses switches rather than jumpers to select the voltage output on each rail.
That last point is a two-edged sword, though. For one, it’s easy enough to accidentally switch the selected power. Also, the jumpers used on the YwRobot module allow for a third option: floating. If you remove the jumper, nothing is output on the rail, which can be useful. Not possible with this module.
The main gripe I have about it is this:
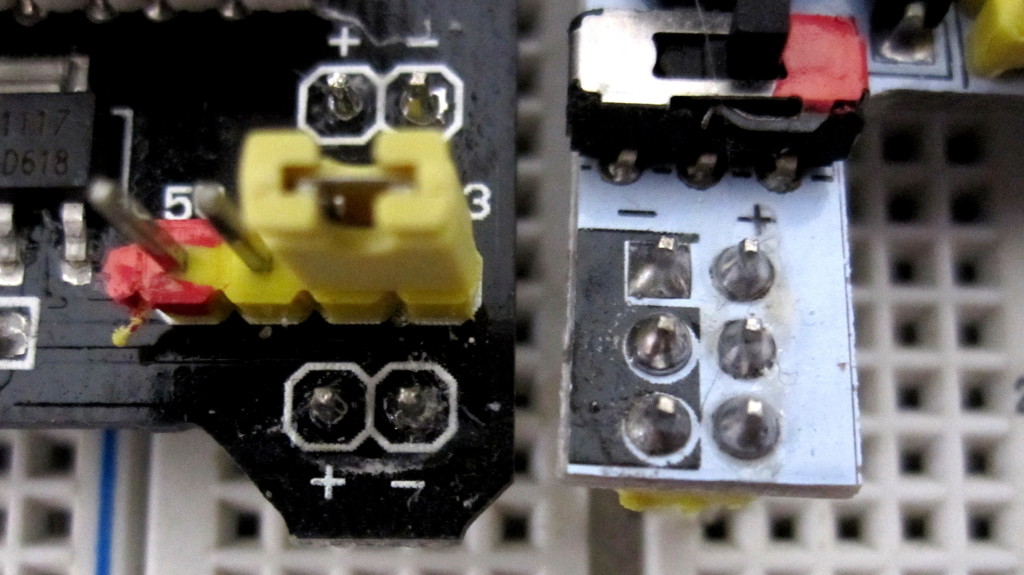
Unlike the others, this one has the ground rail to “the left”, which can bite you hard if you stick it at the top of the breadboard like the other. I’ve actually blobbed this, since the photo was taken, but don’t use it much these days anyway.
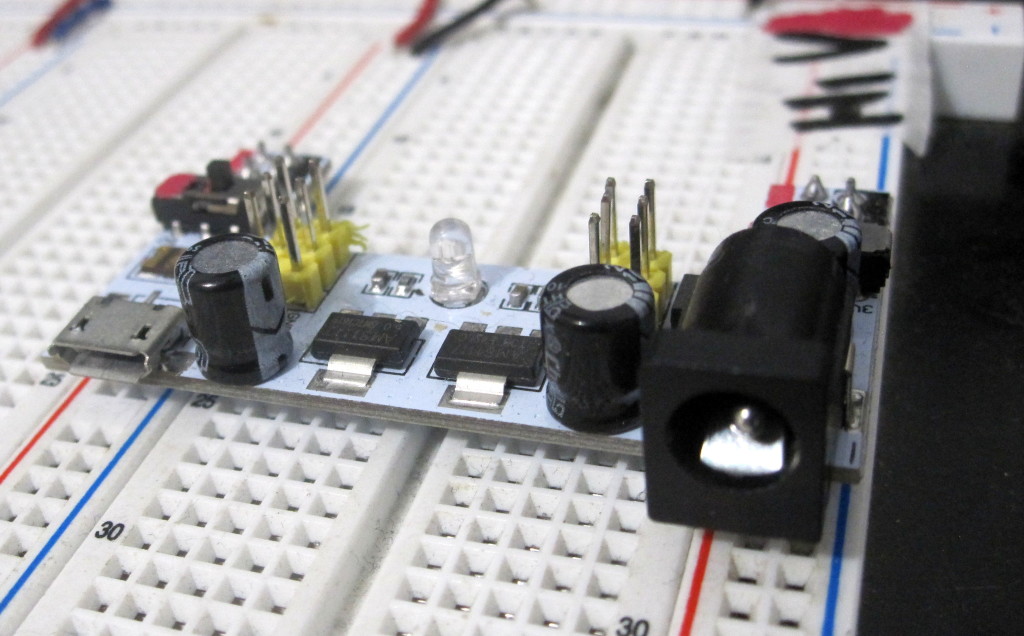
Blue Devil Supply
I don’t know if I somehow fried this last no-name guy or if it was always like this. It was the first such module I purchased and have used it a lot, but its most serious issue is that, with the two regulators on-board and the jumper markings:

you would assume it would play nice and give you 5V on its OUT1. Nope: whatever’s in the barrel jack comes straight out into your breadboard. Not super.
Conclusion
There are tons of options for powering your breadboard, available online. The main lesson to retain is to get a few options and do some testing (and optional warning marking) before you wire in your precious chips.
Still, all these modules give you a clean way to provide power to your prototypes and, if you stick to USB inputs you’re certain to avoid pumping twelve volts into your circuit.
Happy prototyping!