
Python scripting is no longer reserved for Kicad layout: now you can make changes to schematics, or wholly generate circuit assemblies, with the skip library, which is a general purpose s-expression file parser and manipulator with a whole bunch of kicad-specific enhancements.
Someone called it “openSCAD for schematics”, and it’s a good analogy.
I’ll use FreeCAD for most mechanical designs but if a structure is repetitive, regular or just well described in an algorithmic way, then I reach for OpenSCAD, which is a powerful and efficient tool if you’ve got programmer-fu.
With the kicad-skip library, the same now holds for schematics.
There’s an overview, with interactive and programming demonstrations, online:
and here I’ll add some notes and give an overview, for the text inclined.
The short version is that you can load up a kicad schematic, and the library will gather all the elements in the file and present them as either:
- objects, with mutable attributes and utility methods; and
- collections thereof
Some elements are little more than a wrapper around some string or numeric value.
In this case, the attribute will have some “.value” that is whatever was in the source file, e.g.
>>> sch.paper
paper = A4
>>> sch.paper.value
'A4'
Others are slightly more involved, but barely. For example, this is what the raw text contents of the schematic file look like for a junction somewhere on the page
(junction (at 50.8, 38.1) (diameter 0) (color 0 0 0 0)
(uuid 00428791-2fd4-4b01-9881-530d6302be6a)
)
In the library, if this was object ‘j’, you might interact with it thusly
>>> j
<Junction [50.8, 38.1]>
>>> j.at
<at [50.8, 38.1]>
>>> j.at.value
[50.8, 38.1]
>>> j.at.value = [10, 20]
>>> j.at
<at [10, 20]>
>>> j.color
<color [0, 0, ...]>
>>> j.color.value
[0, 0, 0, 0]
>>>
So you can see that the hierarchical structure is represented using attributes and the leaf elements wind up with a .value that is some raw python type, that may be read or written.
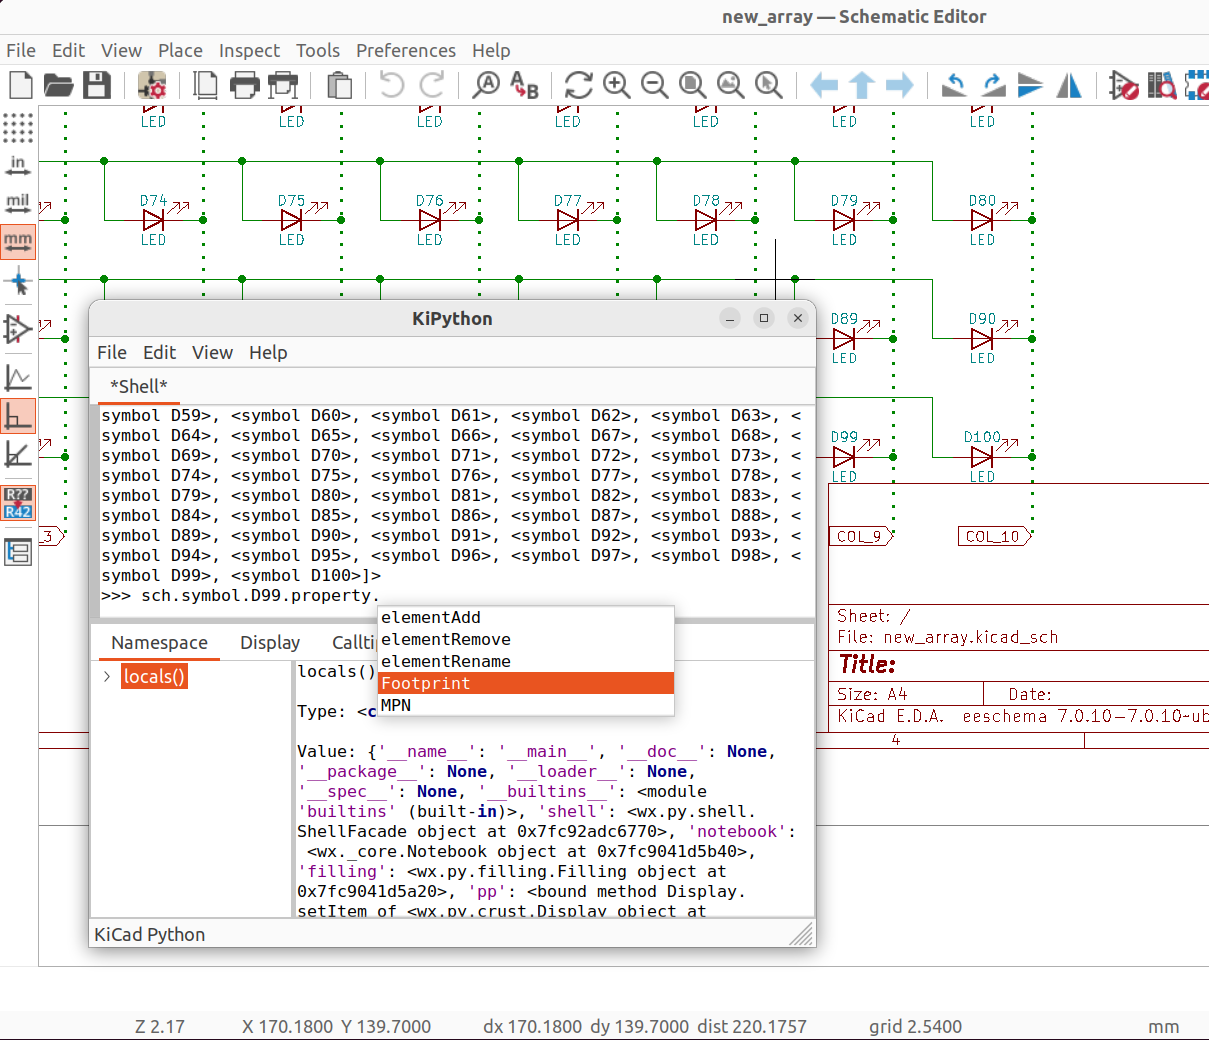
There are two main ways to leverage the modules: interactively, through a REPL, and in stand-alone scripts.
REPL
The library is designed to be well behaved in the Python shell, which makes interactive inspection, quick edits to a schematic, and general exploration during development really easy.
You may have noticed, in the sample REPL interaction above, that the objects have human readable representations (overrides to __repr__, so we don’t just see <path.to.some.module.Class 0x0b13c7add355> or whatever) and this is one of the niceties included to make interactive use enjoyable.
Other sweet features include the ability to use many collections as lists, hashes or with named attributes, online help() on important classes.
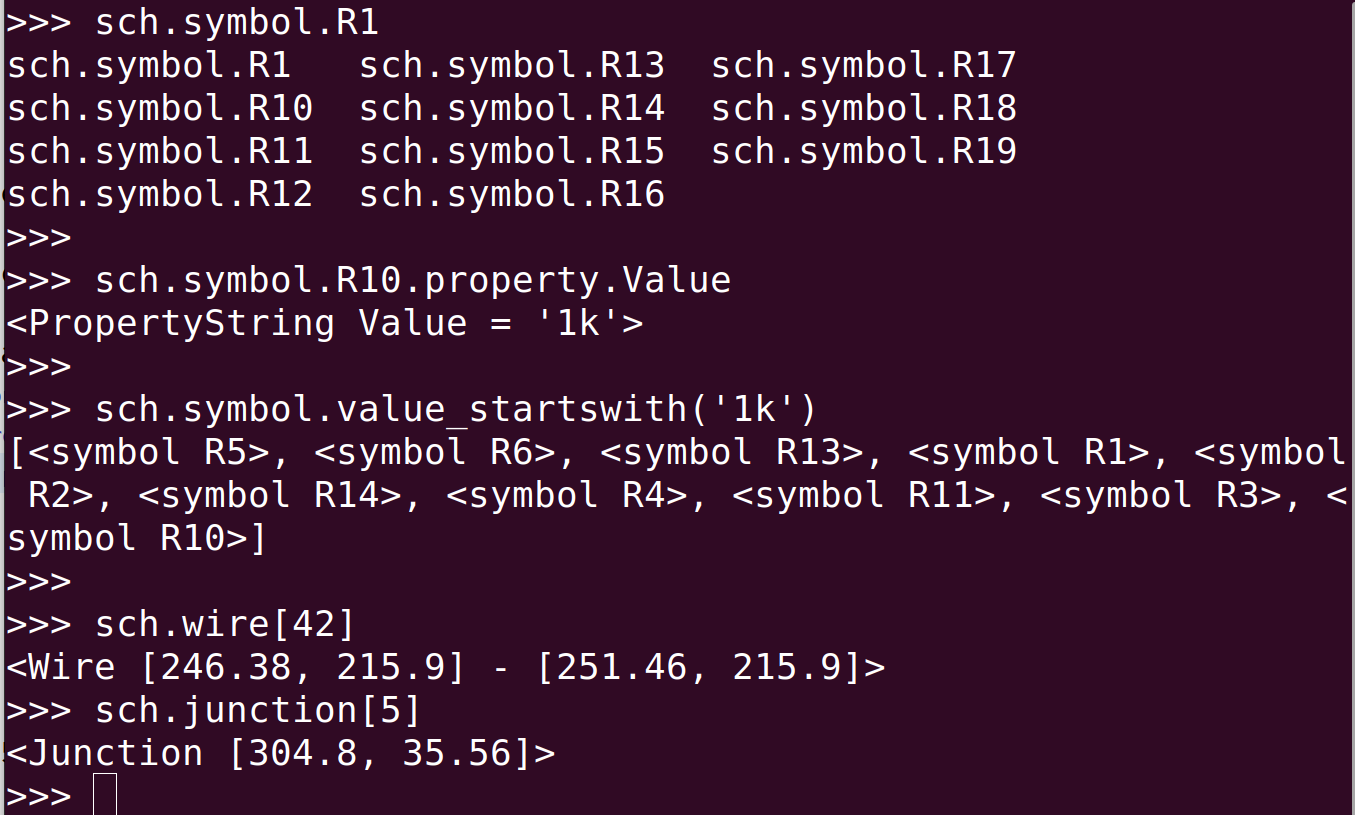
For things with unique names, like schematic symbols, this means the collection may be access however is most appropriate:
>>> # by list index
>>> sch.symbol[0]
<symbol D200>
>>> # by key
>>> sch.symbol[‘D200’]
<symbol D200>
>>> # as attributes
>>> sch.symbol.D200
<symbol D200>
and that last one means that code-completion works very nicely. Do myschem.symbol.R<TAB><TAB> and you’ll see all the resistors in the sheet. I like that.
Scripting
Whether in the REPL on in a script, there are really only three kinds of activities that relate to the schematic:
- Reading and writing the schematic itself;
- Finding or creating elements; and
- Manipulating those elements (moving them around, reading and setting values)
The schematic source file
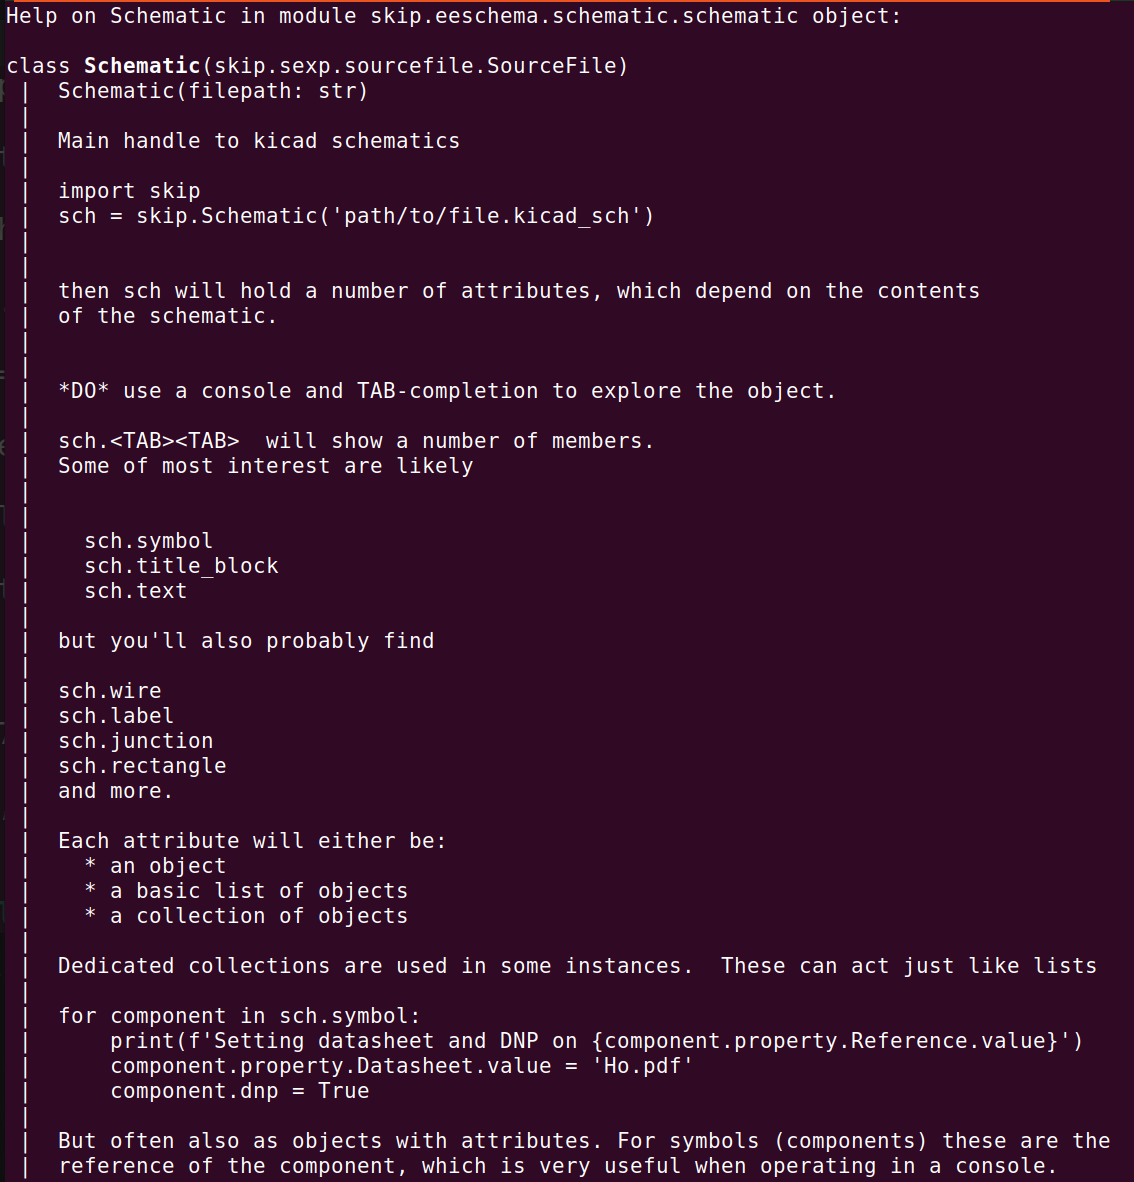
The Schematic class is derived from SourceFile and all such classes support loading in s-expression files, reading in the tree and dynamically populating attributes of the instance based on the contents of that tree.
The constructor for SourceFile objects requires a parameter to indicate the path of the file to load:
from skip import Schematic
schemfile = '/path/to/my_schem.kicad_sch'
schem = Schematic(schemfile)
From there, the schem object will have a number of attributes related to the contents of the file. All SourceFile based object support
- read(FILEPATH) / write(FILEPATH);
- reload() to clear everything out and read the last parsed file
- overwrite() to write current structure to last read file
Getting a hold of schematic elements
Once you’ve loaded a Schematic object, you’ll find it is comprised of
- simple attributes: top level attributes, like paper or title_block as described above, that may have a value or sub-attributes with a value
- collections: things that look like lists, and may be enhanced further.
The collections in the schematic group elements of a certain type together. This includes:
- symbol: components in the schematic
- global_label and label: two types of labels
- lib_symbols: the library elements symbols are based on
- sheet: hierarchical sheets within
- wire, junction and no_connect: the connecting elements of the schematic
- text: blocks of text
- image, rectangle, polyline: visual stuff
Some of these may not be present if not found in the schematic. Collections may always be treated as lists
>>> len(schem.wire)
611
>>>
>>> schem.junction[-2]
<Junction [331.47, 45.72]>
>>>
>>> schem.text[4]
<text Options f...>
>>> schem.text[4].value
'Options for basic filtering \nand ESD on USB conn.\nAt a min, populate the ferrite \nand TVS diodes.'
>>>
>>> schem.symbol[-2].property.Value
<PropertyString Value = 'W25Q32JVSS'>
>>>
This means you can loop over them or use filter() in regular ways:
>>> list(filter(lambda j: j.at.value[0] < 40, schem.junction))
[<Junction [35.56, 99.06]>, <Junction [29.21, 59.69]>,
 <Junction [29.21, 52.07]>, <Junction [35.56, 111.76]>,
 <Junction [29.21, 62.23]>, <Junction [29.21, 49.53]>,
 <Junction [29.21, 57.15]>, <Junction [29.21, 54.61]>,
 <Junction [29.21, 45.72]>]
>>>
>>> list(filter(lambda s: s.property.Reference.value.startswith('U'), schem.symbol))
[<symbol U4 (unit D)>, <symbol U1>,
 <symbol U4 (unit C)>, <symbol U3>,
 <symbol U2>, <symbol U4>,
 <symbol U4 (unit B)>,
 <symbol U4 (unit E)>, <symbol U7>]
Most elements of interest are located somewhere in the page–meaning they have an at attribute with coordinates. Schematic object provides methods to locate items by position. This includes
- within_rectangle(X1, Y1, X2, Y2);
- within_circle(X, Y, RADIUS);
- within_reach_of(ELEMENT, DISTANCE); and
- between_elements(ELEMENT1, ELEMENT2);
These also work on collections, in which case the list will only include items of that type
>>> schem.junction.within_circle(30, 45, 8)
[<Junction [29.21, 52.07]>,
 <Junction [29.21, 49.53]>,
 <Junction [29.21, 45.72]>]
>>>
Finally, certain collections may have additional methods related to their element type. For now, this mainly applies to symbols–the components–which we’ll often want to collect based on reference or value. Thus, the symbol collection includes
- reference_startswith(STR) and reference_matches(REGEX);
- value_startswith(STR) and value_matches(REGEX);
>>> schem.symbol.value_matches('68')
[ <symbol R26>, <symbol R23>, <symbol R25>,
  <symbol R22>, <symbol R29>, <symbol R24>,
  <symbol R27>, <symbol C3>, <symbol R28>]
Creating new elements
There are two ways to create new elements:
- clone an existing element; or
- call new() on the element collection
Cloning should work on anything where it makes sense. By this I mean all the actual items defined in the source file, that are turned into attributes or elements of a collection.
Cloned elements will be identical, deep, copies of whatever acted as the source of the clone, and will be at the same level in the tree hierarchy. This means that a cloned symbol, which is a top level element, will wind up at the top level of the tree.
A symbol property, however, which is embedded in a symbol, when cloned will wind up at the same level within the same symbol.
>>>
>>> myclone = schem.symbol.U2.clone()
>>>
>>> # has (basically) same properties as original
>>> myclone.property
<Collection [<PropertyString Reference = 'U2_'>,
   <PropertyString Value = 'TLV1117LV33'>,
   <PropertyString Footprint = 'Package_TO_SOT_SMD:SOT-223-3_TabPin2'>,
   <PropertyString MPN = 'TLV1117LV33DCYR'>]>
>>>
>>> # give it a new reference
>>> myclone.property.Reference.value = 'U_NEW'
>>>
>>> # create a new property, give it a name and value
>>> extraprop = myclone.property.Value.clone()
>>> extraprop.name = 'NewProp'
>>> extraprop.value = 'SWEET'
>>>
>>> myclone.property
<Collection [<PropertyString Reference = 'U_NEW'>,
   <PropertyString Value = 'TLV1117LV33'>,
   <PropertyString Footprint = 'Package_TO_SOT_SMD:SOT-223-3_TabPin2'>,
   <PropertyString MPN = 'TLV1117LV33DCYR'>]>,
   <PropertyString NewProp = 'SWEET'>]>
>>>
>>> # both symbol and property are in their respective collections
>>> schem.symbol.U_NEW.property.NewProp
<PropertyString NewProp = 'SWEET'>
>>>
While clone() will work on pretty much anything, there are some restrictions to new().
All the simple elements, like wires, junctions, labels, etc, should have a new() available. You’ll want to set their position, value etc as applicable.
>>> join_wire = schem.wire.new()
>>> join_wire.start_at(schem.symbol.D2.pin.K)
>>> join_wire.delta_x = 0
>>> join_wire.delta_y = -2.54
The exception is actually the more interesting elements, namely the symbols: these don’t have a new().
This is because symbols, to work, are pretty complicated affairs. They have a bunch of pins. They have properties, they have a lib_symbol element that must map to something in the lib_symbols.
For the moment, at least, there is only support for cloning for these beasts.
The converse operation is delete() and that should work on anything. I would avoid using the dangling reference after a delete.
Manipulating elements
I won’t go into all the details here. The REPL help() and documentation will go into details and be most up to date, and the charlieplex example are good places to start.
But I will highlight some things of particular interest.
Basics
As mentioned at the start, most things you’ll want to change have a .value attribute which is where you’ll set the value. You set this according to whatever it actually is, usually strings, not always
>>> schem.text[-4]
<text sck>
>>> schem.text[-4].value = 'SCK'
>>> schem.text[-4]
<text SCK>
>>>
>>> schem.text[-4].at.value
[246.38, 254.635, 0]
>>> schem.text[-4].at.value = [20, 30, 180]
>>> schem.text[-4].at.value
[20, 30, 180]
>>>
Symbols
Lots of important things in the symbols are actually in it’s properties collection.
>>> schem.symbol.U3.property.Reference
<PropertyString Reference = 'U3'>

>>> schem.symbol.U3.property.MPN
<PropertyString MPN = 'AP2112K-1.8TRG1'>
These are special in that they may have user-defined names, like MPN above. The name for the four primary ones, Reference, Value, Footprint and Datasheet can but should most likely not be changed–kicad expects them. In any case they have both a .name and .value
If you change the name, it’s no longer accessible under that old name in the property collection
>>> schem.symbol.U3.property.MPN.name
'MPN'
>>> schem.symbol.U3.property.MPN.value
'AP2112K-1.8TRG1'
>>> schem.symbol.U3.property.MPN.value = 'ABC123'
>>> schem.symbol.U3.property.MPN
<PropertyString MPN = 'ABC123'>

>>> schem.symbol.U3.property.MPN.name = 'OhNoes'
>>> schem.symbol.U3.property.MPN
Traceback (most recent call last):
  File "<stdin>", line 1, in <module>
  File "/path/to/collection.py", line 284, in __getattr__
    raise AttributeError(f"Unknown element {key}")
AttributeError: Unknown element MPN
>>> schem.symbol.U3.property.OhNoes
<PropertyString OhNoes = 'ABC123'>
If you change the reference value, it should now be accessible in the symbol collection under that new name.
There are also boolean flags associated to the symbols. Some of these are built-in and always present
 >>> schem.symbol.U3.in_bom
in_bom = True
>>> schem.symbol.U3.dnp
dnp = False
>>> schem.symbol.U3.on_board
on_board = True
>>>
>>> schem.symbol.U3.dnp.value = True
>>> schem.symbol.U3.dnp
dnp = True
These may be treated as regular boolean (basically they are cast that way) when read
>>> for sym in schem.symbol:
...     if sym.dnp:
...         print(f'DNPed {sym.property.Reference.value}')
...
DNPed C44
DNPed C47
DNPed U3
DNPed J17
DNPed R42
DNPed C45
DNPed J8
DNPed C46
DNPed C3
DNPed J9
DNPed J2
DNPed R16
DNPed J1
DNPed U7
>>>
Others may be optional, and is_power is just a generated, read-only convenience (True if this is from the power: library).
>>> schem.symbol.U3.is_power
False
>>> schem.symbol.PWR010.is_power
True
Symbols usually have pins. These are a bit complexicated. Sometimes they have names, often they are just “~”. They have a position, but not set in the symbol: the symbol is placed somewhere, with an at value, and the pins are relative to this coordinate and rotation, based on offsets from the library symbol.
If the pins are named, they can be accessed that way
>>> schem.symbol.U3.pin
<Collection [<SymbolPin 1 "VIN">, <SymbolPin 2 "GND">,
             <SymbolPin 3 "EN">, <SymbolPin 4 "NC">,
             <SymbolPin 5 "VOUT">]>
>>> schem.symbol.U3.pin.EN
<SymbolPin 3 "EN">
>>> schem.symbol.U3.pin.EN.location
<AtValue (210.82, 73.66, 0)>
Pins with Python-unfriendly symbols are massaged into usability. This allows attribute based access, but does not impact their actual name:
>>> schem.symbol.U4_E.pin.nOE
<SymbolPin 15 "~{OE}">
>>> schem.symbol.U4_E.pin.nOE.name
'~{OE}'
With pin names, you must be careful–sometimes there are multiple pins with the same name, in which case… who knows which one you’ll get from the named pin attribute.
It is always safe to access the symbol pin attribute as a list, whether pins are named or not, whether there are dupes or not
>>> len(schem.symbol.U3.pin)
5
>>> schem.symbol.U3.pin[2]
<SymbolPin 3 "EN">
>>>
Since the pins do have a location, but this location isn’t an actual attribute of the pin object (but based on a calculated offset), this is made clear by avoiding the confusion of generating an at attribute. Instead, the location, if you actually need it, is provided through a location attribute on the pin
>>> schem.symbol.U3.pin[2].location
<AtValue (210.82, 73.66, 0)>
>>> schem.symbol.U3.pin[2].location.value
[210.82, 73.66, 0]
Wires
Wires are everywhere in here and have two associated coordinates. The raw values are in a list called pts, and accessible that way
But, because they’re buried and not all that fun to use, and placing wires is important, there are a number of convenience functions.
There are start and end attributes that basically map to those raw xy coordinates.
>>> w
<Wire [172.72, 147.32] - [175.26, 147.32]>
>>> w.pts
<pts [<xy [172.72, 147.32]>, <xy [175.26, 147.32]>]>
>>> w.pts[0]
<xy [172.72, 147.32]>
>>> w.pts[0].value
[172.72, 147.32]
>>>
There are convenience methods to start and end at any location: these can be coordinates in an array, an at attribute from something else or anything that has an at attribute or location.
>>> w
<Wire [172.72, 157.48] - [175.26, 157.48]>
>>> w.start_at(schem.symbol.U3.pin.EN)
>>> w.end_at(schem.symbol.U3.pin.VIN)
>>> w
<Wire [210.82, 73.66] - [210.82, 71.12]>
>>>
>>> or end on another wires end
>>> w.end_at(schem.wire[22].end)
>>> w
<Wire [210.82, 73.66] - [317.5, 152.4]>
>>>
Finally, because we often want to draw wires in known ways, we can set a start location, then use deltas to stretch the wire in any direction (which will set the end point to meet your requirements)
>>> w
<Wire [172.72, 147.32] - [175.26, 147.32]>
>>>
>>> w.start_at(schem.symbol.U3.pin.EN)
>>> w.delta_y = 0
>>> w.delta_x = 20
>>>
>>> w
<Wire [210.82, 73.66] - [230.82, 73.66]>
>>>
Junctions and no connects
Junctions and no connects are very simple. They exist, they have an .at set of coordinates (only xy, no rotation, so a 2 element array of floats)
Text and labels
Text and labels have a position (a 3-element .at which includes a rotation). Their value is the textual content.
Conclusion
I think that’s more than enough to get you started. The main caveat here is that the library operates on source files. Though it actually loads just fine in the eeschema console
at the moment it can’t actually get a hold of the currently loaded schematic, or impact that, or even cause a refresh of the eeschema page. eh. This will wait for kicad version 9, it seems.
I hope you find the library, and this post, useful. Submit issues or pull requests through the github repo for the kicad-skip library, and have fun!