A few tweaks I’ve made or simply printed, make my new compound microscope that much cooler to use, and I’m sharing them here along with some details on the process.

I only recently got the microscope—specifically a Swift SW380T trinocular scope, for which the microbehunter has some tips and a video review—and I had so much fun with it on my first evening with the device that I recorded and posted a few scenes of the cool stuff I saw.
One thing that bothered me a bit was that for some reason, even with what they call the parfocal ring extended to the maximum amount, neither of the video cameras I tried on it were actually exactly par-focal—meaning that the camera was never in focus at the same position as the eyepieces. Almost, but not quite… was missing just a few extra millimeters.
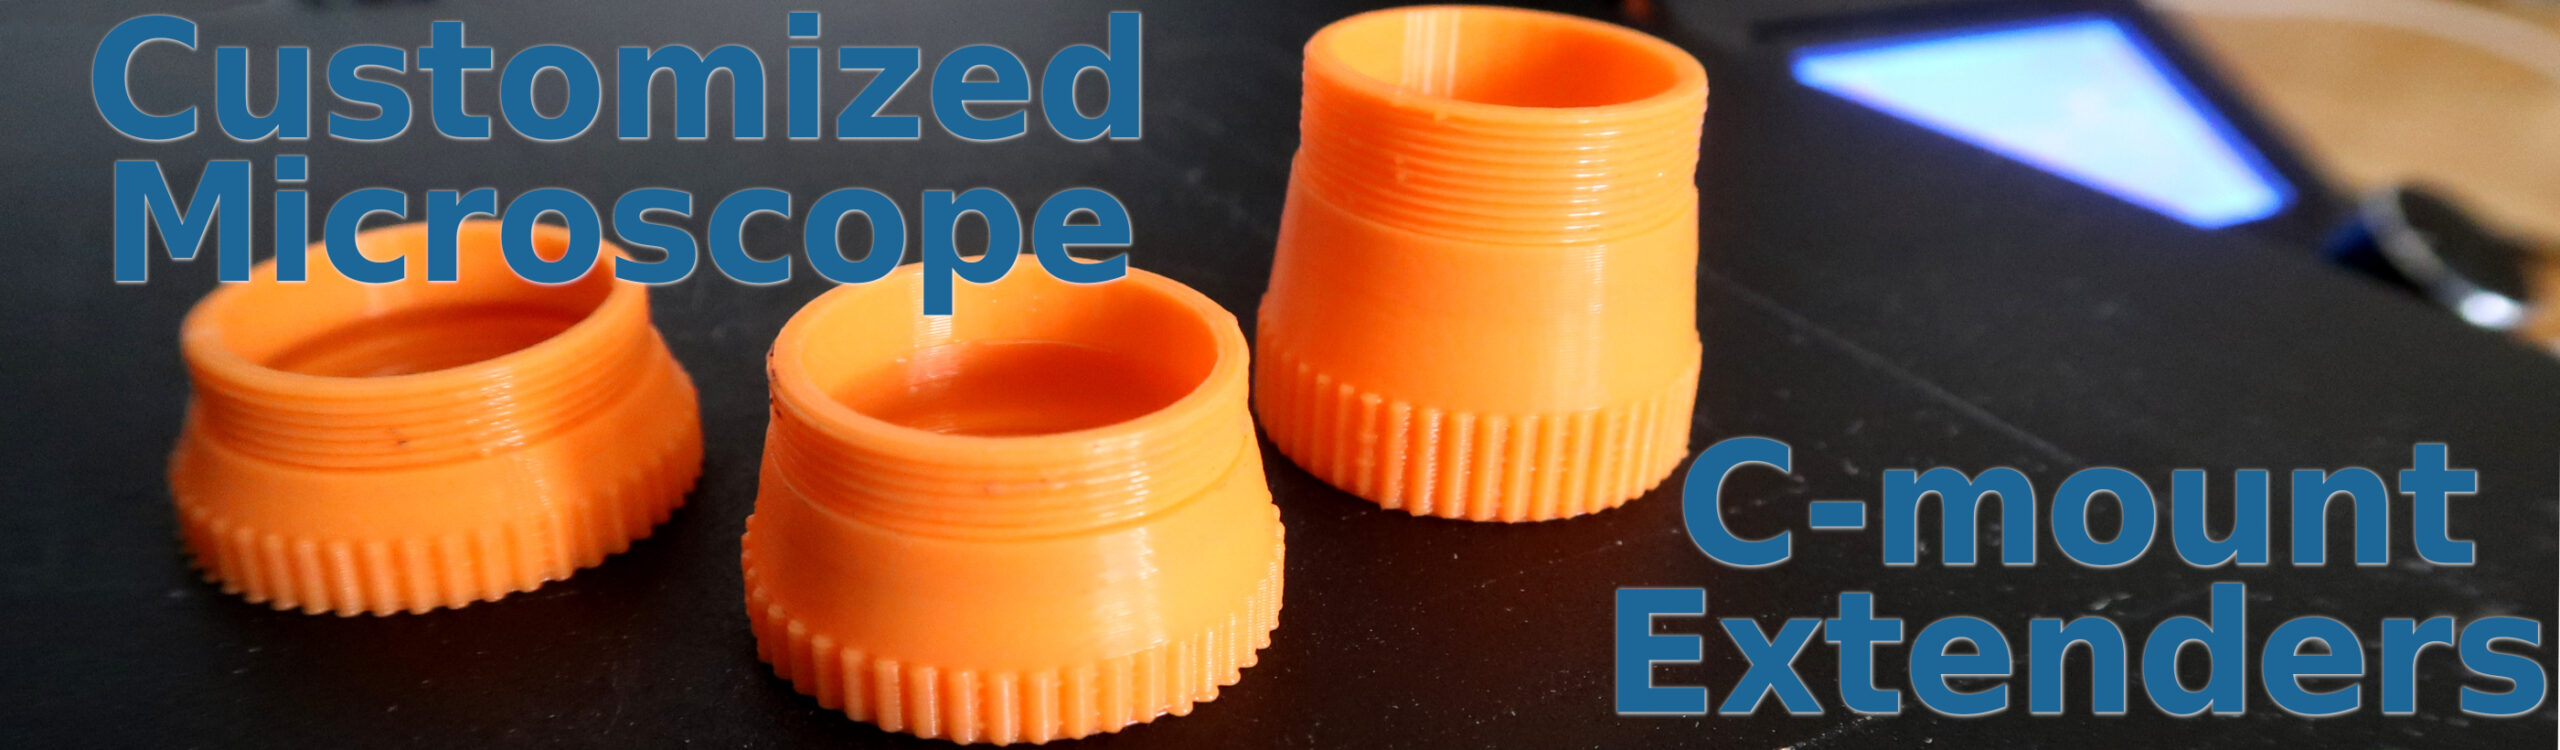
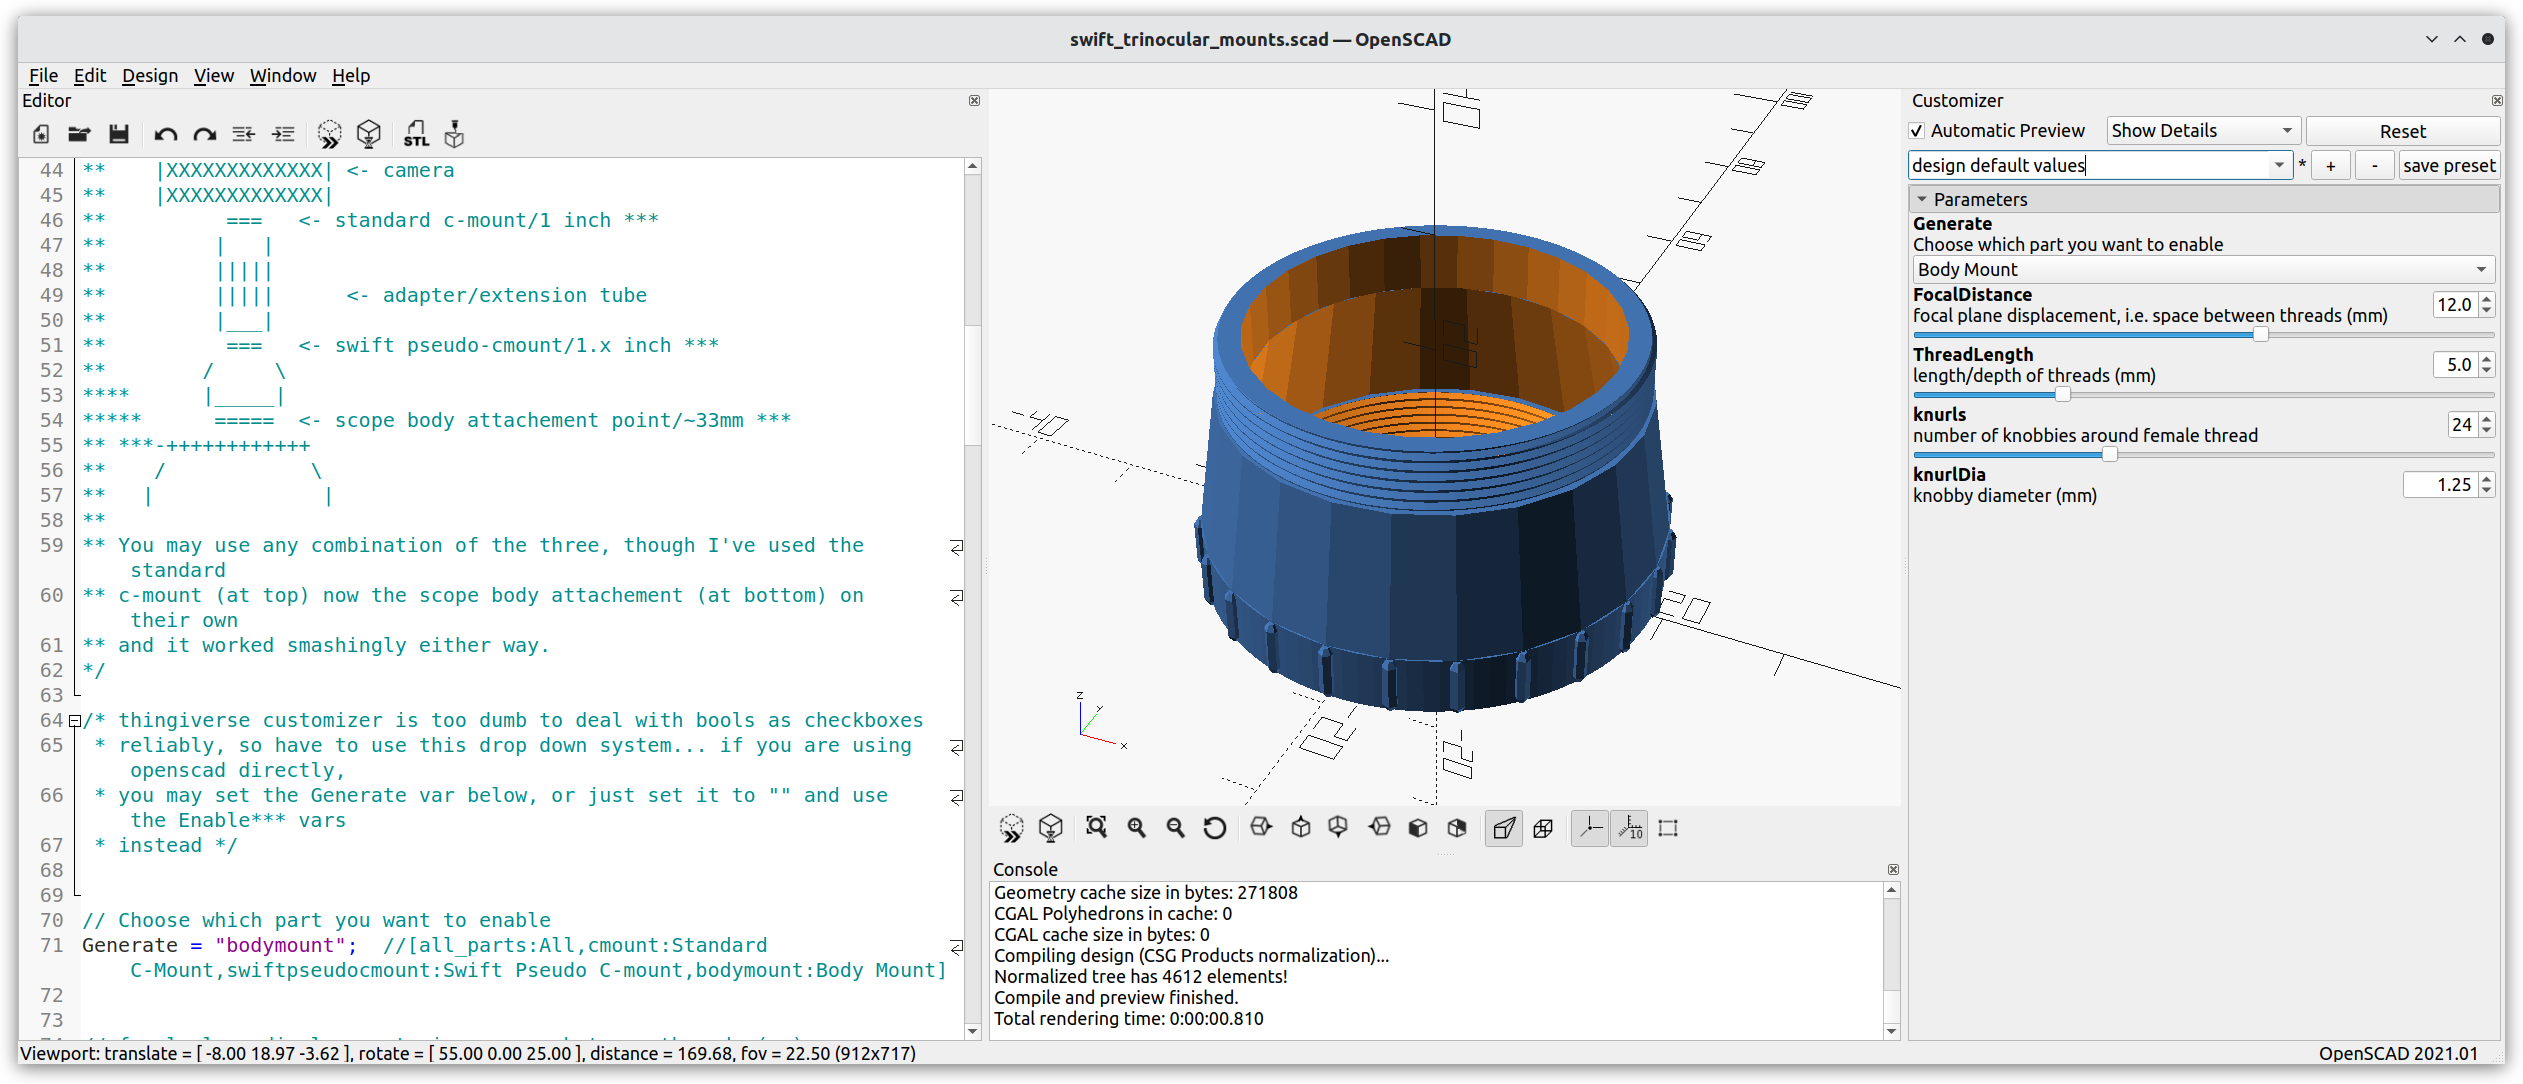
So I busted out the 3D printer and used OpenSCAD to forge myself a simple C mount extension—just the c-mount male thread, a connector tube, and a female c-mount. Took a bit of futzing to get the tolerances right but it worked pretty well.
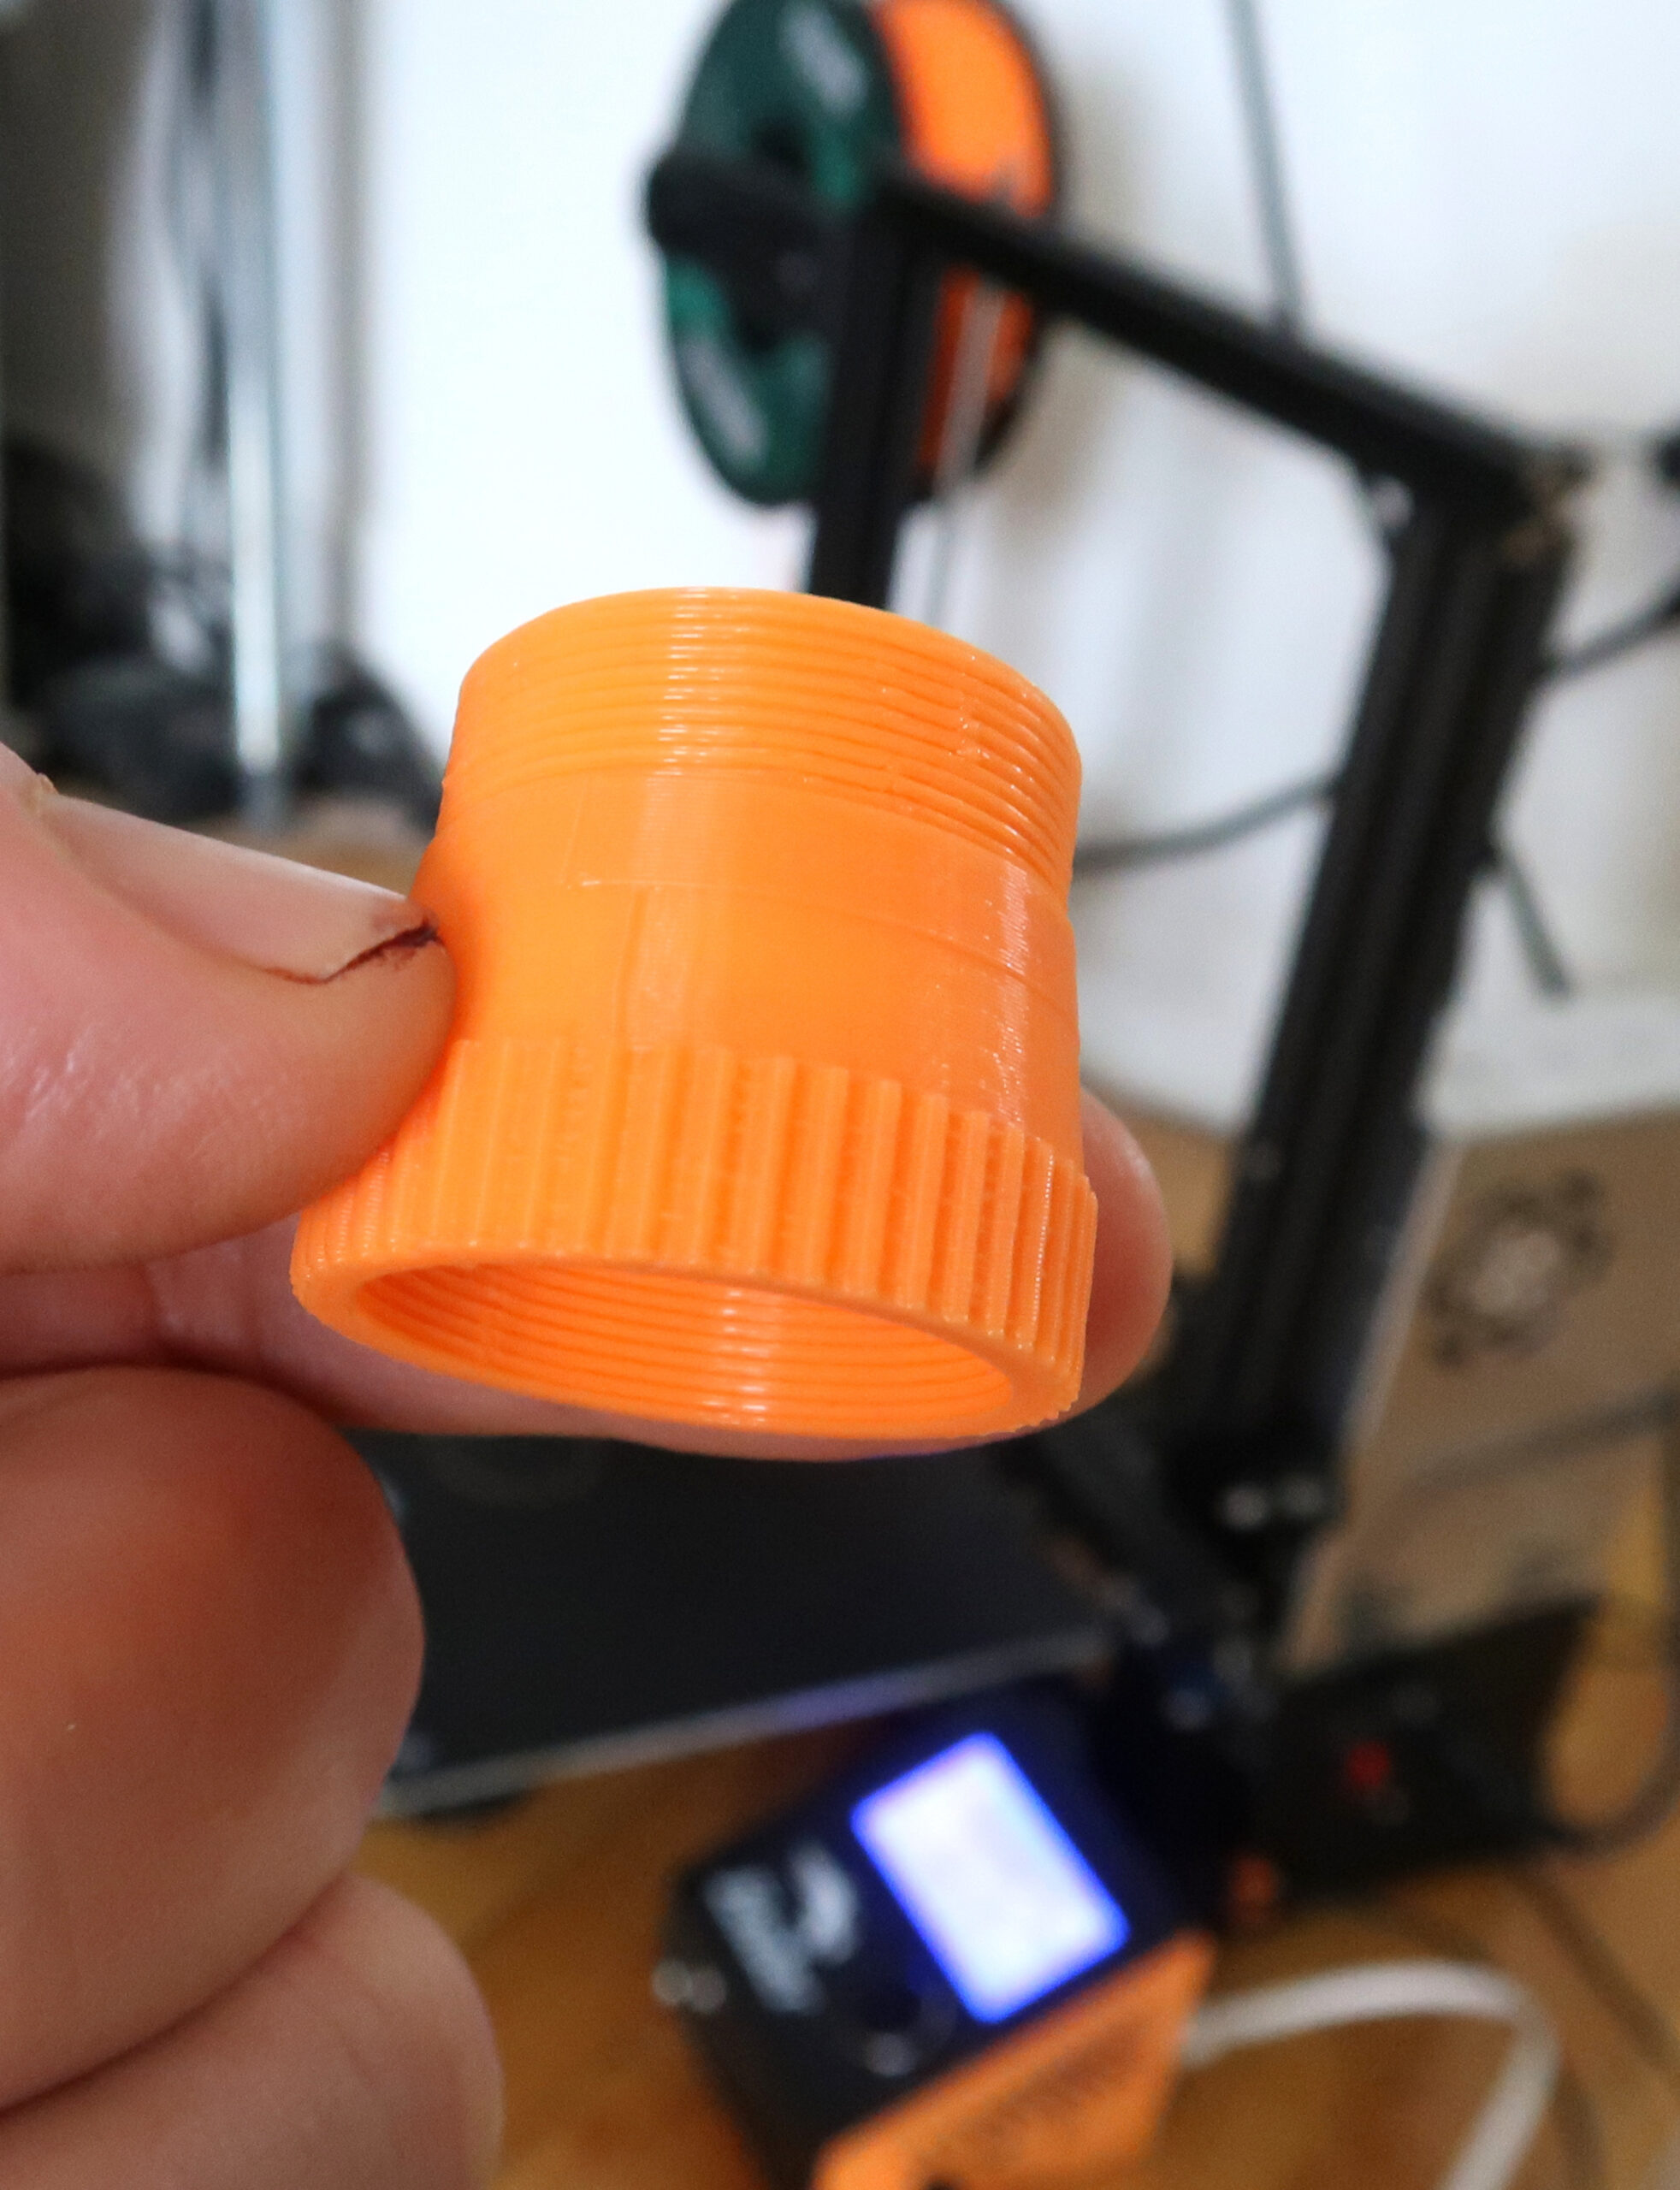
I only had to roughly guesstimate the required focal distance extra because, as long as you don’t undershoot, the parfocal extension tube thing gives a good deal of play for bringing it in closer. In theory that was mission accomplished and I was done. However I had orange filament in the printer and, with the extension just before the camera, it was leaking coloured light into the field of view most notably at low light.
The annoying thing was that you’d think the parfocal adjustment at the bottom of the tube would be a c-mount connection as well but no, it’s close but not quite compatible (why, Swift, why? Maybe just to ensure we screw it in the right way ‘round? Dunno).
Using a marker to paint the insides black helped, but it wasn’t perfect and my curiosity was piqued.
So I started measuring and experimenting, eventually coming to a design that works for all three attachment points.
Since they’re all just extensions, with male + tube + female thread, I reworked the openscad file to streamline things and released it all on the thingiverse.
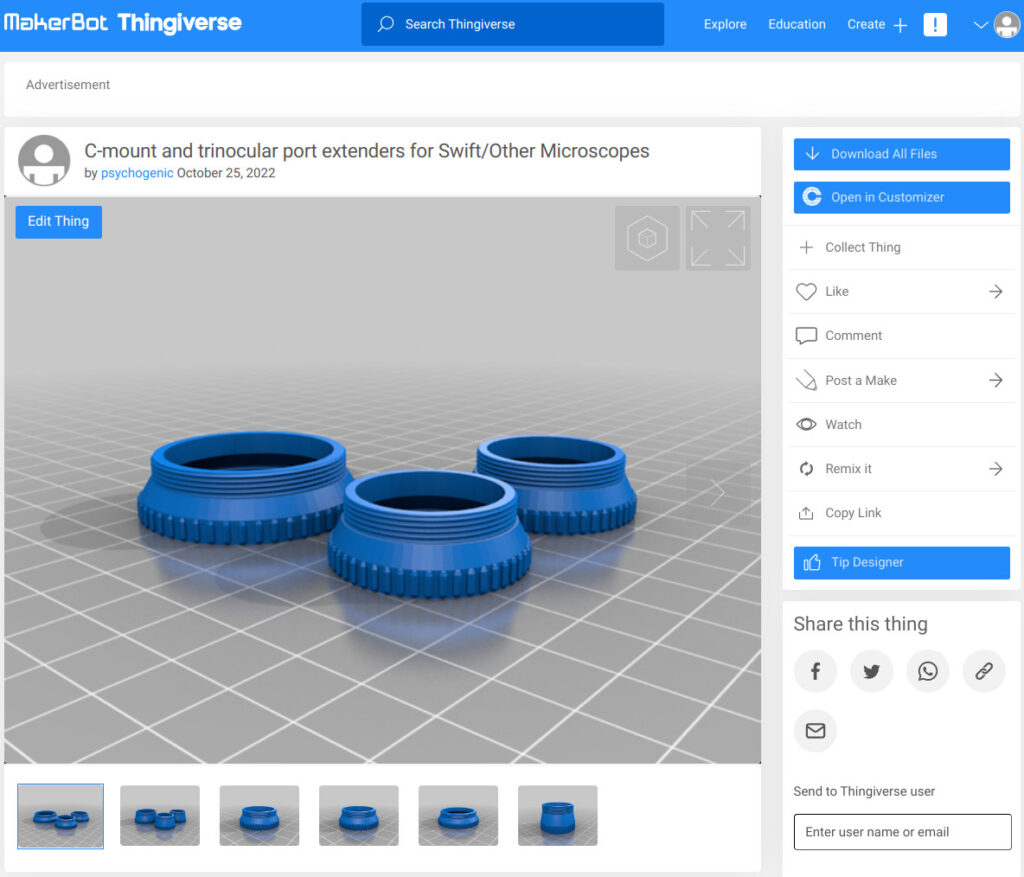
I’ve generated a few samples as STL files, of the entire set and of each element. The cmount files are just standard cmount extensions, the “pseudo-cmount” is the Swift almost-cmount (at the bottom of the tube) and the “body” is the larger attachment point at the bottom that holds the tube.
Here’s the scope with all three mounted, which is ridiculous (you only need one) but shows how they all fit onto the mounting points.

The openscad file user the customizer functionality to allow you to select which of the extensions you want to generate, the focal distance (length of tube between threading) etc.
On the thingiverse, the customizer sometimes works, sometimes gives a timeout error and seems to often have a bad case of the sux.
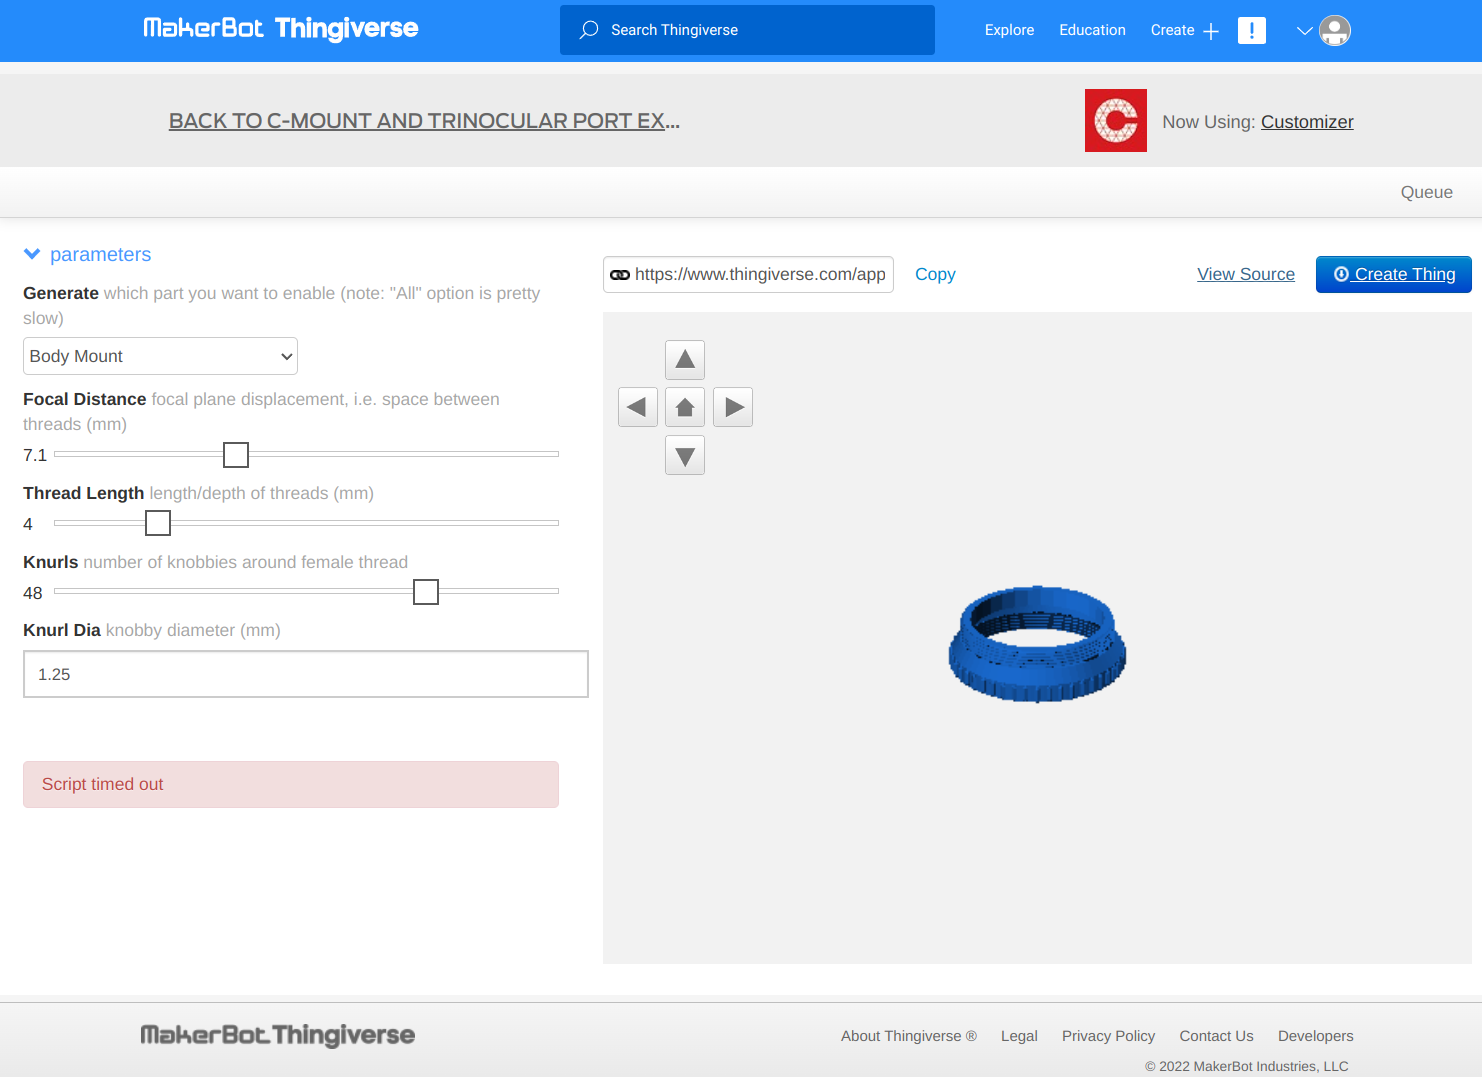
It’s pretty slow regardless.
I’m not sure why generating this is so painful, but I’m relying on the threads library and it seems pretty tough. However, I’m no openscad expert and it may be possible to optimize things greatly (advice, anyone?).
In any case, I’d recommend just using the scad file directly… STL gen is still a bit painful, but it works.
If you do want to use OpenSCAD directly, you’ll need to get the neat-o thread-drawing modules library. Just plop the file alongside my swift_trinocular_mounts.scad file.
In the end I’m not certain that the values I’m using are perfect matches but, with 0.15 or 0.2mm layers, the following seems to work pretty well:

- c-mount: 25.4mm (1 inch) diameter, 32 threads/inch;
- parfocal/swift pseudo-c-mount: 25.91 mm diameter, 32 threads/inch; and
- body mount point: 34mm diameter, 30 threads/inch
(sorry for the mix & match of units, but it seems clearer this way or at least easier to type).
I think these would also work with the Swift SW350T but I don’t know–if you have one and try any of these out, please let me know how it goes.
Sidenote: while I had both the microscope and 3d printer out, I also extruded myself the Darkfield Microscope Filter Lens… still had that orange filament, so used that magic marker to darken things a bit and it gives some pretty nice results.

Well worth the whole 6 minutes it took to print up!
Hope that helps you in your explorations of the micro-world.