I just finished a project for which I we needed to connect a raspberry pi to a distant server, over a 3G connection. The module was to be autonomous–it would be powered on demand and needed to reboot into a consistently usable state to perform its duties.
Creating a shield (or “HAT” in Pi terminology) to go atop the B+ was pretty straightforward, and coding in python was a nice change of pace: multiple threads and what seems like infinite RAM–what luxury!
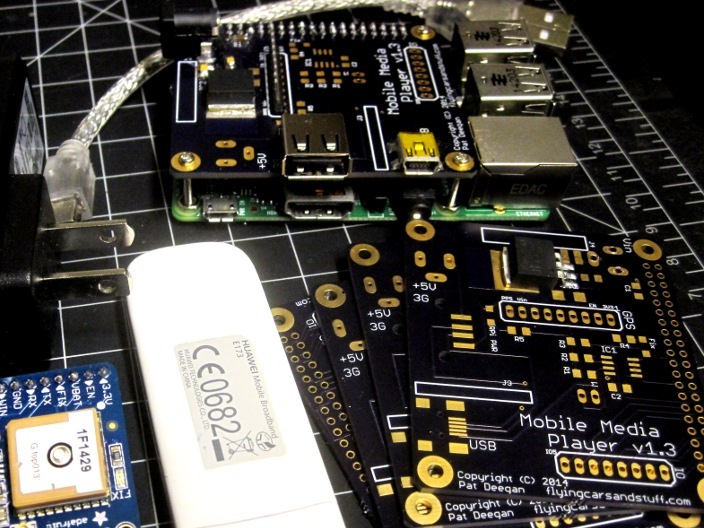
Mobile Media Player, based on 3G-connected GPS-aware Raspberry Pi
The only area of contention was getting a decent connection to the internet.
If you’ve looked into this, you already know that the 3G dongles can be energy hogs and, for some reason that still escapes me, the raspberry pi is pretty stingy in terms of amount of power it it willing to deliver through the USB ports irrespective of the power supply you provide. So, the first order of business is usually getting a powered USB hub. In this case, since I was designing an extension board, I just created a simple “powered USB hub” by sucking in the data lines from the Pi but powering the broadband dongle myself, using and external voltage regulator, and back-powering the pi from the same supply. Easy peasy.
The thing that really gave me a headache was setting up the Huawei (E182E and E173s) dongles to get connections reliably. I found lots of documentation online about this, though half of these concern some script that is no longer maintained, and the most useful were explanations of how to setup wvdial to get things working. After a bit of futzing with config files and usb_switchmode, the deed was done. Or so I thought.
For some reason, it was practically impossible for me to get a consistent response from the modem. These 3G dongles annoyingly default to behaving as removable storage in an effort to make things easy for the Windows people, so they can read docs (yeah, right) and install the drivers required. Under Linux systems, we need a way to prompt the device to switch it’s mode of operation and present itself as a modem rather than as a USB flash drive.
When this happens, the USB device identifier switches to some other value and the dongle behaves as a communication device (can be treated as a serial device and will respond to the AT command set, or some sub/superset thereof). Most online docs would have you use usb_switchmode to accomplish this, and this kinda worked for me. Sometimes.
The short of it is that if you follow the directions online, you’ll wind up with a wvdial configuration and a usb_switchmode install. But, at least in my case, the usb_switchmode would only work some of the time. Most of the time, after a powerdown/hard reset, the Pi would detect the USB modem as an scsi/flash drive, setup a softlink like
/dev/cdrom -> /dev/sr0
and just stop there.
In these instances, the Huawei E182E and device I was using would show up in lsusb as device 12d1:1446 (or 12d1:1c0b for the Huawei E173) and just stay stuck there. Sometimes, issuing a
sudo reboot
would work and, instead of the “cdrom” link I’d get a few /dev/ttyUSB* devices. In those instances, running wvdial would setup the ppp connection and all was grand. But working *sometimes* isn’t really an option, here. There will be no human operator and I want to minimize fuss anyway.
I tried a number of things, like adding rules in /etc/udev/rules.d to try and ignore the block device ID, manually running usb_switchmode on boot etc. To no avail. The solution I finally came up with is as follows:
1) Install wvdial, ppp, sg3-utils
sudo apt-get install wvdial ppp sg3-utils
2) Find the two product IDs of interest. One will be for when the device presents itself as a “cdrom” (removable storage) and the other when the modem is acting like a modem. In my case these were,
For the Huawei E182E:
    12d1:1446 -- cdrom
    12d1:14ca -- HPSA modem

For the Huawei E173s
    12d1:1c0b -- cdrom
    12d1:1c05 -- modem
3) Setup wvdial to something that works when the dongle is being a modem. Lots of docs online for this, but the important discovery in my case is that it’s better to have
Username = dummy
Password = dummy
than nothing at all (wvdial refused to proceed to connection when the username/passwd were commented out). So my final /etc/wvdial.conf (included as wvdial.conf.sample in the tarball) is:
[Dialer Defaults]
Init1 = ATZ

; Huawei E182E:
Init2 = ATQ0 V1 E1 S0=0 &C1 &D2 +FCLASS=0

; Huawei E173
; Init2 = ATQ0 V1 E1 S0=0 &C1 &D2

Init3 = AT+CGDCONT=1,"IP","YOUR_APN"
Modem Type = Analog Modem
ISDN = 0
New PPPD = yes
Username = dummy
Password = dummy
Modem = /dev/ttyUSB0
Dial Command = ATD
Stupid Mode = 1
Phone = *99#
Baud = 115200
Replace YOUR_APN and the Phone entry by whatever is appropriate for your connection. For Bell, the APN was pda.bell.ca. One useful trick is (when the dongle is in modem mode) to run wvdialconf as a regular user (not root). It will communicate with the usb serial and try out different options, reporting on the results of what works without actually changing the wvdial.conf file (since it should be owned by root).
4) Edit /etc/ppp/peers/wvdial and make it look something like
noauth
local
name wvdial
usepeerdns
5) Edit /etc/network/interfaces and add a line for ppp0, so we can ifup/ifdown ppp0. Don’t add “auto ppp0” here or it’ll try to setup the ppp connection before the modem is ready, fail, and then refuse to do its job telling you that ppp0 is already setup (durp). My /etc/network/interfaces now includes a line for ppp0, like so:
iface ppp0 inet wvdial
6) if you have usb_switchmode, get rid of or disable it. I wasn’t certain this would work and had usb_switchmode installed, so I just found the relevant line in /lib/udev/rules.d/40-usb_switchmode.rules (e.g. the one with vendor 12d1 and product 1446) and #commented it out.
7) Download autoconnect-X.X.tar.bz2 and install the files in appropriate locations. Untar it in /tmp (cd /tmp; tar jxvf autoconnect-X.X.tar.bz2) and place/edit all the files in the correct locations manually.
8) Edit /etc/defaults/autoconnect and change the values as needed. In my case, the required USB device ID was 12d1:14ca–change as required–and the “cdrom” (removable media) was pointing to /dev/sr0, change if necessary. This file contains other variable settings that may be useful:
# autoconnect params

# USB_ID -- the id we *want* to see with lsusb (modem mode e.g. 12d1:14ac for Huawei E182E, 12d1:1c05 for E173s)
USB_ID="12d1:14ac"

# SG_DEVICE -- the device that /dev/cdrom points to when in removable storage mode
SG_DEVICE="/dev/sr0"

# SG_SWITCH_COMMAND -- some sg_raw magic, which I found buried in the usb_switchmode Message
SG_SWITCH_COMMAND="11 06 20 00 00 01 00"

# CONNECTION_INTERFACE -- name of interface we want to bring up
CONNECTION_INTERFACE="ppp0"

# USB_SWITCH_TIME -- time to wait for the switch to happen and for udev to setup the ttyUSB* (seconds)
USB_SWITCH_TIME=10
9 ) Try it out. With the dongle inserted,
sudo /etc/init.d/autoconnect start
If you actually want to see some output from the script, edit /lib/init/vars.sh and change VERBOSE=no to
VERBOSE=yes
Once everything is in place and you know its working, you can run
sudo insserv autoconnect
to have autoconnect start automatically when you boot.
Operation
For the curious, and those who need to tweak things for their particular setup, an overview of how it works… In short, the autoconnect script checks for the device ID using lsusb (USB_ID in /etc/default/autoconnect). If it’s there, it’ll just exit. If it isn’t found, the script will:
- Issue a raw command to the block device, to get it to switch. The command bytes included work for my Huawei and probably others. You can find these by looking in the “Message” stuff from the usb_modeswitch configPackage and/or online.
- Wait a bit to allow for the dongle to switch mode and be detected as a usbserial (time spent sleeping configured by USB_SWITCH_TIME)
- Call ifup INTERFACE (ppp0 in /etc/default/autoconnect)
And that’s it! I hope this doc, and the autoconnect init script, will be useful to you as well. I’d enjoy hearing about your success or trials/tribulations, so don’t hesitate to get in touch.