Kicad is an cross-platform, open source, electronics design suite. I’d toyed with it in the past, but had never made it to actually designing real projects with it until recently. Here, I’ll go over my experience and initial impressions, and provide a few pointers and resources for anyone curious about trying it out. We’ll tour the process of getting from design to finished PCB with emphasis on the great and the not-so-great, focusing on a few issues with tips on how to get around them.
Kicad itself is best thought of as a wrapper around a set of programs you use in the process of going from idea to PCB. As such, there’s still some inconsistency in how you work at each stage of the process. Though getting my head around some of the weirdness involved in setting it up (e.g. adding your own footprint library can be tricky the first time) and using it (for instance, you can only drag a PCB track when you’ve first put yourself in “Add tracks” mode) took a while, so far I’ve found it to be quite powerful and it doesn’t suffer from arbitrary limitations (like on the number of layers or the size of the boards).
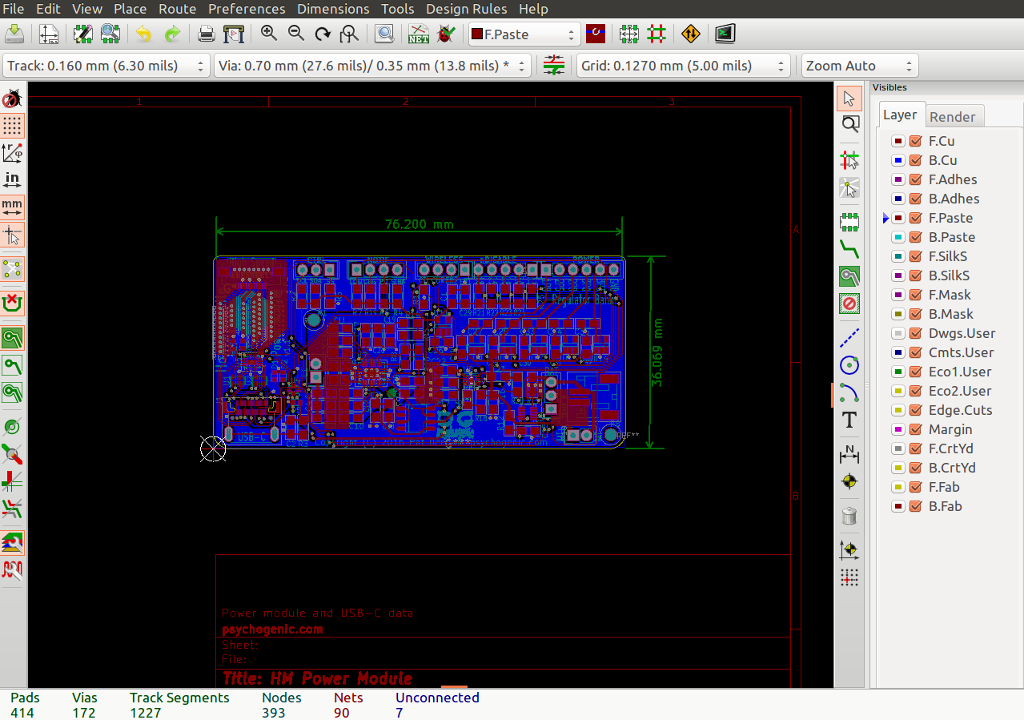
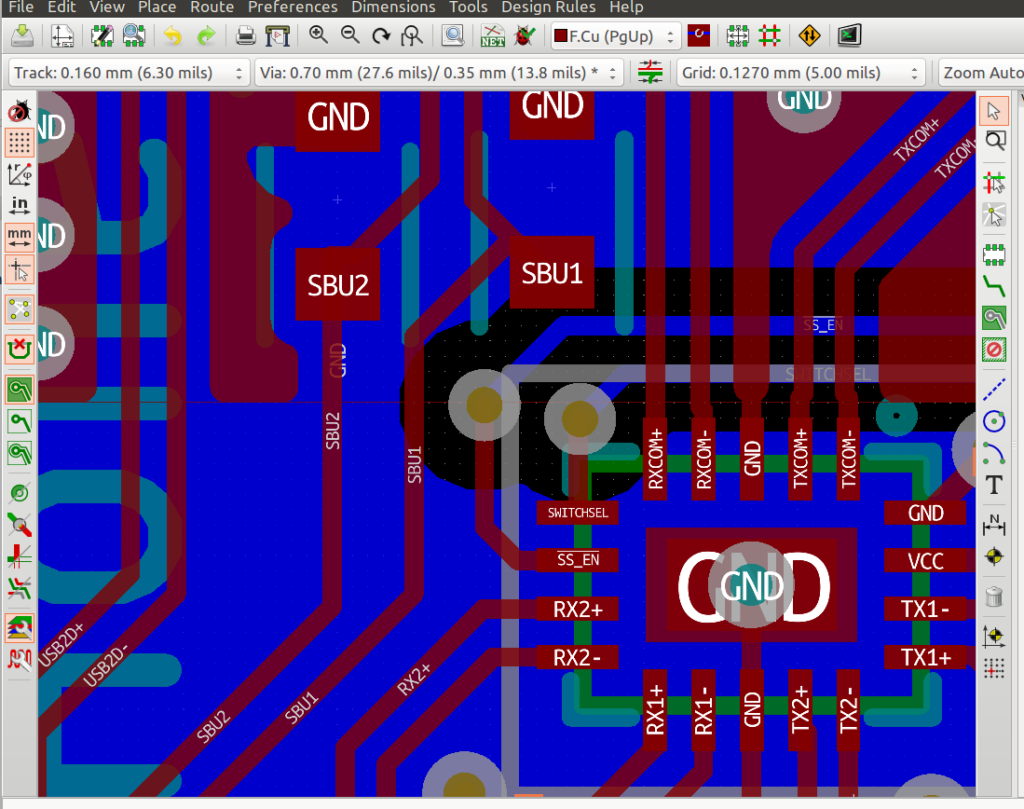
I decided to try it out with a small but non-negligible project: about 400 pads for 100 components. The result looks like this, in PCBnew (the PCB editor):
One really neat feature is the ability to visualize the end result in a 3D viewer:
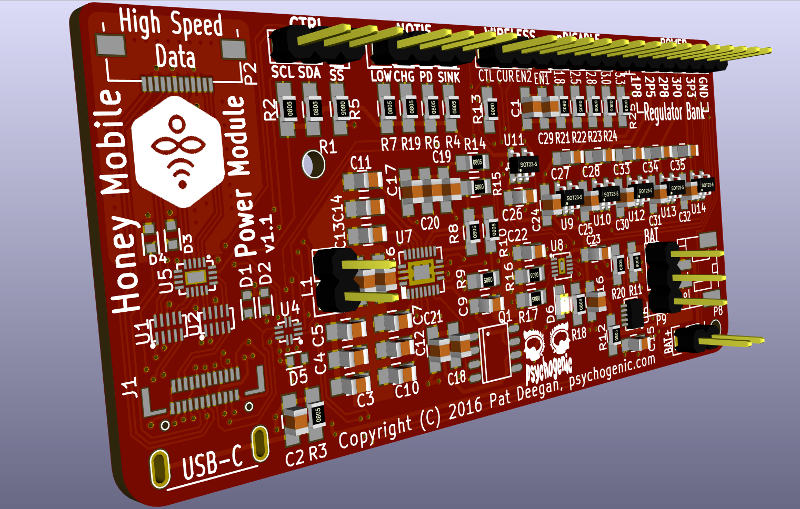
Uhm… wow! Note that some of the components (the one’s I created custom footprints for) don’t have 3D models yet, but it still displays the pads and gives a pretty good idea of where we’re headed without a single moment of effort on my part. Very sweet.
EDIT: this board was actually produced and tested, some details a few more lessons learned have now been posted.
Setup
First off, though they warn you it’s experimental/not ready for primetime, at this point the nightly builds are waaaay ahead of the stable release. Most of the cool features CERN has been adding to kicad–shove routing, the built-in SPICE simulator, and pretty much everything I’ve found really cool–is only to be found in the nightlies… you probably want to install that, unless they’ve finally updated the stable to include the coolness.
Setting it up is, to me, a little more involved than it should be but is well documented. I’d say the essential steps are:
- install the software;
- tie into the github components/footprint libraries
- create and configure your own, globally available, component and footprint libraries
The getting started guide is obviously a good place to start. I also found the videos produced by Contextual Electronics a pretty fine place to get going too, especially to help you setup the github libraries but on other fronts as well.
Working through a project
Once you’ve got everything installed, you create a new project and are ready to begin. Most of your time will be spent in eeschema (while designing the schematic) and then in PCBnew (to create the printed circuit board) but you’ll also likely wind up making detours through the library editor to create components and in the footprint editor to setup pads for custom packages.
The Kicad getting started guide has a nice flow chart describing the process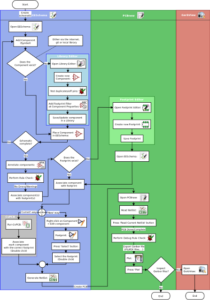
Designing a circuit
There weren’t too many surprises in terms of using eeschema. The first thing to do, however, is to change a few of the keyboard shortcuts by going to Preferences -> Schematic Editor Options -> Controls.
For some reason, it doesn’t seem like the fact that you’ll be using the mouse–like, all the time–is taken into account. So I’d suggest immediately switching the shortcuts for, at least:
- Rotate Item;
- Drag Item; and
- Move Block -> Drag Block
so that they’d be accessible with the left hand. Tab, Q and the back tick ` are some of my faves for this. Use “?” to list the hotkeys at any time.
Hierarchical Sheets
One thing I really love is how it handles hierarchical sheets, allowing you to create functional blocks of circuitry and keep everything organized in a way that gives you a nice high level view of what’s going on, while letting you dig down into specifics as required. Here’s a view of the top level schematic, with an overlay of the contents of one of the hierarchical sheets:
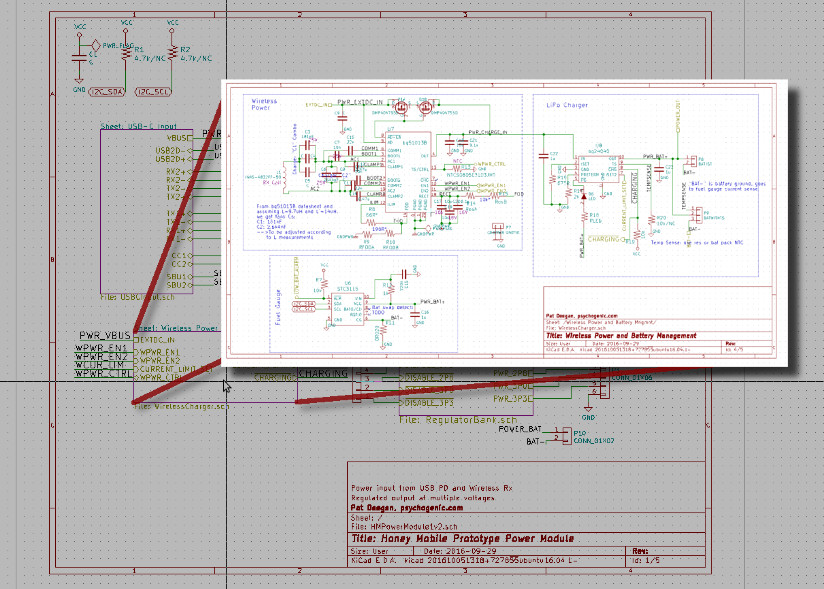
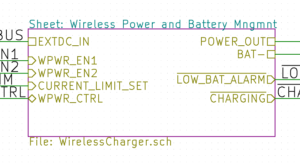
As you can guess, the top-level sheet is just a bunch of interconnected blocks. Each block (sub-sheet) has the actual circuitry, as well a the requisite number of hierarchical labels. The labels (within the sheet) are imported as sheet pins in the upper layer and provide the interface–what’s visible to the outside. Here’s a view of that block as seen by the top sheet:
I’ve got five pins coming in, on the left, and four coming out on the right. The big mess of a circuit within only needs to be dealt with when you actually need to and the rest of the time it’s all about interface. It’s Object Orientation, for circuits! The only annoying part is that the program forces you to import the pins one at a time (right-click the block -> Import sheet pins).
Another really neat aspect of this is that you can replicate the blocks, which is quite useful if you have some subcircuit that gets repeated a lot. Any changes to the master sheet will be reflected in each duplicate, but the components will get a different designator every time their repeated. Cool.
Net Labels
You can label the nets in 3 different ways and place multiple (different) labels on a single net, which is powerful but can be dangerous/confusing.
Global labels are visible everywhere–so if you repeat that net name in some sub-sheet, it gets connected to the others with the same name. This is mighty useful for something that goes everywhere, e.g. I2C lines, SDA and SCL.
Hierarchical labels are, as described above, used to expose some net in a sub-sheet to upper layers. They need to be placed in your (sub)sheet, then “imported” and connected to in the hierarchical sheet in the upper layer.
Plain old labels are just regular net names. They’re used to connect nets within a single sheet.
Unlike in, say, Eagle labels aren’t associated to a specific net–they’re not the net’s name until they’re actually tied to a net. That makes them easy to move around, but can be misleading if you didn’t notice the little square that indicates that it’s not connected to anything, i.e. that it’s only sitting next to a wire.
Also, the program forces you to retype the blasted name every time… so if you want to connect some 5 distant pins, you’re going to hit “L” and type (or paste, of course) “MYLABEL” 5 times. A better way would be for the Label Properties box to popup with the last label entered, pre-selected so any typing will erase it (hint hint, Kicad guys). In the meantime, a quick CTRL-A CTRL-C the first time, followed by a little CTRL-V for every label works ok.
In any case, labeling any wire that will go any sort of distance on the PCB will be well worth it, when it comes time to edit the board.
New components
Eventually, you’ll want to add a component that doesn’t yet exist. For this, you’ll create the thing in the library editor. That’s covered below, but here I’d like to mention how smooth the process is. First, because components are completely independent of footprints, it takes no time to go from a datasheet to a new component you can add to your circuit. Eeschema doesn’t even force you to reload the libraries or do anything: once it’s been saved, hitting “a” to add a component will find your new part and give you a little preview. Nice.
Power
Power–GND, VCC, etc–gets added using it’s own dialog (press “p”) rather than as a component. I got used to it quickly, though. Apparently, adding a new power symbol is somewhat involved and has hard-to-find caveats, but I haven’t had to do this yet, so I don’t know.
To summarize…
Joy
- hierarchical sheets are super cool
- the component adding interface works very nicely
- the net labelling is very flexible
Sadness
- Hotkeys aren’t ideal but are easy to fix
- The scroll wheel zoom is pretty funky
- You have to “Clarify Selection” a little too often for my taste (which may be unavoidable)
Component Library Editor
The library editor is pretty much as you’d expect. I also had to edit the hotkeys here, and for some reason my assignment of “Tab” to Move Item didn’t seem to work. Instead I just use the mouse to draw a selection square around what I want to move, which works most of the time except when it starts moving some nearby element (really annoying).
Using it is straightforward for simple parts, and isn’t too bad even for parts with multiple units.
Sadly, you have to manually set each pin number rather than having it auto-increment by default. Also I find it faster to use my modified “rotate” shortcut rather than selecting the counter-intuitive (to me) orientation drop-down.
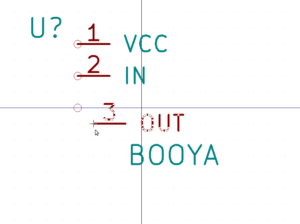
Finally, the behaviour of selecting to add a pin, clicking a spot on the screen only to have a popup appear and subsequently ignore the spot (but for a ghost artifact in the window, as shown below) is a bit off-putting.
Still, it does the job well and you don’t spend much time in there anyway.
Moving to the PCB
Once you’ve got a nice circuit designed to your liking, you need to prepare everything for PCBnew. To do this, each part needs an identifier, which is done by annotating the schematic
This process is nicely automated, and will transform all those R? and U? to R1,R2… U1, U2… etc.
Once that’s done, you can run the electrical rules check (the little lady bug button) if you’re that sort of person, and get ready to export the netlist.
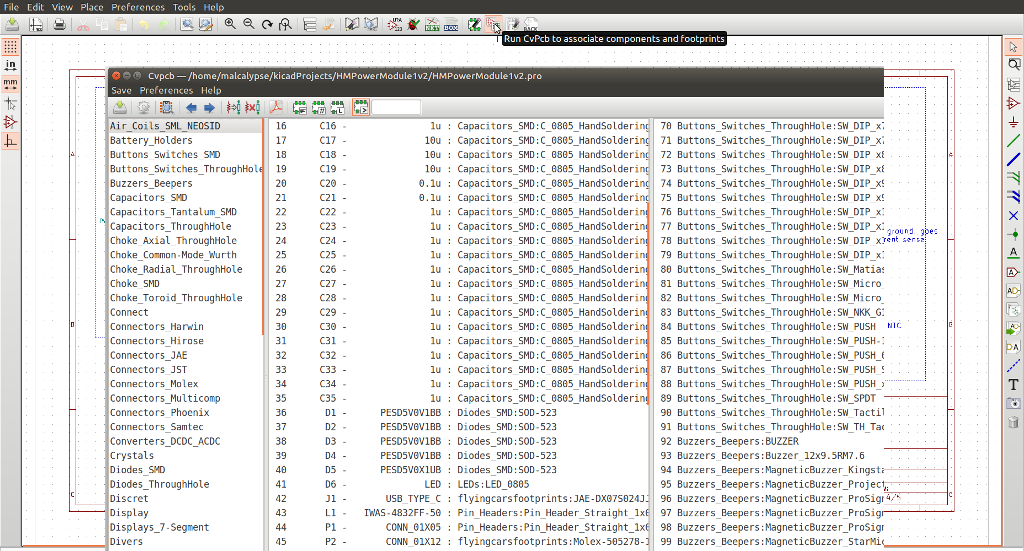
Before that can happen, though, every component need to know which footprint you’ll be using for it. For custom components for which you didn’t create a footprint, you’ll have to pay for the ease of adding it to the schematic earlier by creating the footprint before you can associate it, of course.
It took me a while to discover it, but when you have a bunch of similar components (like all those capacitors) you can multi-select (click the first, then shift-click the last) and associate a footprint to the whole batch in one go.
There are filters to allow you to show subsets of the available footprints and make finding things much easier. Also quite useful is the footprint+magnifying glass button, which opens a window to let you preview the currently selected footprint.
Footprint Editor
The footprint editor is very usable. Worse part of it, to date, is trying to copy things from one footprint to another (I use export/import).
One caveat is the solder mask clearance. It seems the parent/global value is some actual size, rather than a ratio or percentage, so the solder mask gets proportionally large for very small pads. To fix this, mouse over the pad and hit “e” (edit), then go to “Local Clearance and Settings” to set some reasonable value.
Other sadness includes the fact that you can’t draw on some layers (e.g. Dwgs.User), as shown greyed-out here:
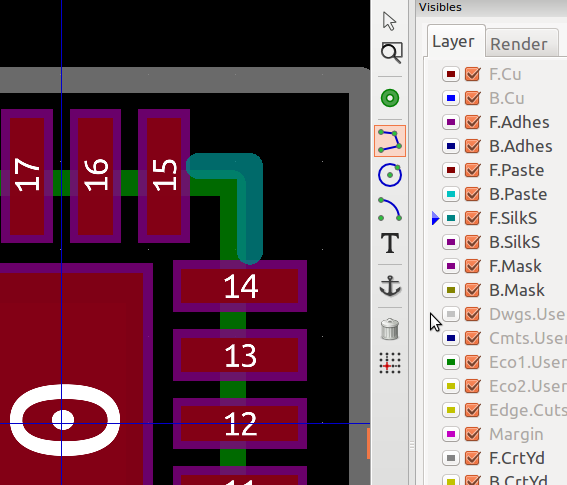
This is doubly annoying in that you can simply draw on the silk screen layer, then edit the line/polygon to change the layer. However, this must be done for each segment, even if you drew them connected. Ugh.
Also, though the tooltip says “Draw line or polygon” I still have yet to figure out how to get a polygon fill… it’s always just a bunch of lines.
One notable joy is how amazingly easy it is to import bitmaps to footprints, using the Bitmap2Component tool from the kicad main interface. Unlike with some other programs, these aren’t bad approximations using some fixed width trace, either. Icons are a simple affair, and you can even create irregular custom board outlines or other cool things with this tool. Neat.
Creating a PCB
So, once all your footprints are created and associated to the right parts, you can get down to the business of creating a PCB. You open up PCBnew for the first time and the experience is a bit underwhelming… a black screen. PCBNew needs to be told what the footprints are and how they’re connected.
To do this, the last step in eeschema is to generate the net list. You hit the “NET” button, leave everything as defaults and click “Generate”. Pretty much it. Switching back to PCBnew, you do the same in reverse to import that net list… Click “NET” then “Read Current…” and bam! A whole bunch of stuff tied to your mouse.
Drop it somewhere and run, don’t walk, to Preferences -> Hot keys -> Edit Hotkeys. Things you might want to configure right away, before you learn the defaults are:
- Add new track
- Add through via
- Drag track keep slope
- Move Item
I feel add new track should be the same as “begin wire” in eeschema, since it’s the same idea. Move and drag should also be the same, but since drag only works when adding tracks, and since you’ll be adding a lot of tracks anyway, it’s an important one too. The switch to copper (bottom, using PgDn) and component (top, PgUp) layer hotkeys might be worth switching as well.
After that, hit F11 or F12 to change the canvas to OpenGL or Cairo. The various views in pcbnew look different but, more importantly, act differently and offer different functionality. I don’t get it, but whatevs. The OpenGL view pretty much rocks.
The final setup step is to go to “Design Rules” and set some up. While you’re there, also set some commonly used track widths and via sizes in the “Global Design Rules” pane. Note that you can select either metric or imperial for the UI (using the buttons on the left side of the screen) but you should avoid switching between them too much because of eventual rounding errors.
Joys of PCBnew
There are a few things I really love about PCBnew. The labelled pads and nets are definitely in the list.
How can eagle not do this yet? Anyhow it’s great to see what’s what at a glance like this.
Also, the way layers get the focus when you switch between them, and the “high contrast mode” (hotkey “H”) are nice to work with. Here are three views of the same portion of the PCB:
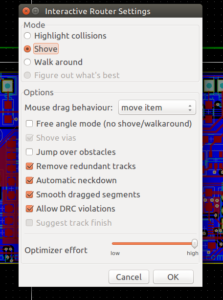 Another great feature are the various router settings. When you’re in “add tracks” mode, hitting Edit (“e”) when the mouse isn’t over a component or trace will bring up the router settings allowing you to choose between various behaviours.
Walk around is great when you’re starting to layout tracks, but the shove router really shines once things start to get crowded. The important thing is to remember to select you grid according to your needs, so it can do it’s magic.
Highlight Collisions is the only mode that will respect the “Allow DRC violations” checkbox and let you break the rules you’ve setup. Use with care.
But wait, there’s more! The final great joy of pcbnew was mentioned at the start: the 3D viewer. You can open this window with View -> 3D Viewer and it will update dynamically as you modify the PCB. It’s very cool and comes at no extra cost :)
Sadness
There are a few downsides to pcbnew, here are my “favourites” and a few tricks to get around (some of) them.
I’m accustomed to using the grid size to move things exactly, but with PCBnew there are two problems with this. The first is that there doesn’t seem to be a shortcut for setting a custom grid, so you have to go Dimensions -> Grid, which is mighty cumbersome. The second is that once you’ve set your grid, when you move some component instead of moving by whatever distance your grid is set to, it will snap to the next grid point and only then hop the specified amount between locations as you mouse around.
For displacing components this isn’t so bad, though, since there’s a “Move exactly” option in the contextual menu (or CTRL-M, by default) and that dialog remembers the last value you entered making it pretty efficient.
Also on the subject of snapping to the grid, another bad thing is when you want to resize a fill zone. If you’re not at the same grid setting as you were when you created the zone, it has a tendency to wind up crooked and weird… “try to be consistent in your grid selection when creating zones” is the only trick I’ve found so far to deal with that.
A more important source of disappointment so far has been the routing differential pairs. This video is one of the things that sold me to giving kicad a try:
Differential pair routing a trace length matching: cool and useful! However, I found a few problems with the functionality as it currently stands.
The first trouble I encountered was that, though the design rules allow you to specify “Diff pair width” and “Diff pair gap” for each Net class it just doesn’t seem to care about your settings at all. What it does respect is the Dimensions -> Differential Pairs global setting. So you have to set it there, and have to change it every time you switch net classes.
The second issue, which drove me mad for a while, is that if you wind up trying to route a pair that has a gap set to something wider than the space between the pads on which you want to terminate the connection, you are doomed. doooomed. It just won’t ever let you connect. The only way around this is to muck about manually, in single track routing mode.
Also, when you do some routing of differential pair tracks manually/in single track routing mode, it has a tendency to get confused and issue an “Unable to find complementary differential pair net…” popup as shown here:
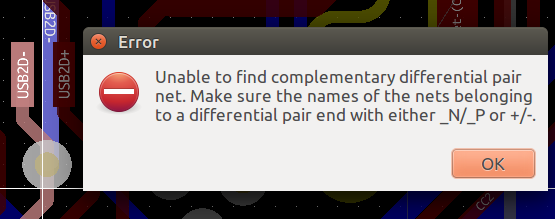
You can see the USB2D+ is right there, next to the USB2D- that was clicked to cause the error. aaagh.
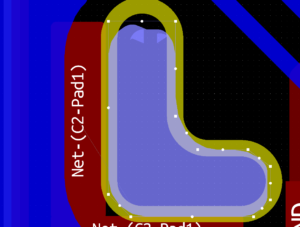
Keep-out zones are an important, and so far completely missing, feature. I’ve standardized on using the Eco1.User layer for milling instructions on my custom parts, but the layer’s ignored while routing so you have to be careful all the time. In one case, I have a receptacle shield pin that requires milling. The problem with not having a keep-out here, in addition to the careful attention required while routing, is that the ground fill was at risk of creating a contact point that I didn’t want.
To overcome this, I created another zone specified as connected to <nonet> (unconnected) as shown selected here:
It would still be possible to route tracks through it but, with sufficient clearance specified, it does the trick.
Finally, you may find yourself scratching your head wondering why your fill zones on a given layer are overlapping. To resolve this, you need to set appropriate priorities in your fill zone settings. I’ve yet to read up on how it actually works, but by setting different values for each zone they seem to keep their clearance from each other.
Wrapping Up
That’s pretty much it, as the rest of the process is straightforward. Once you’re done laying out your PCB, you can arrange the part references, have a final look at the 3D view and export Gerber and drill files using the plotter.
This also concludes my preliminary thoughts and the few tricks I’ve amassed during this first trial run of kicad. I hope you’ve found them useful and will give kicad a whirr!
I’ll be producing some PCBs in the near future and will share the results. Have fun!

