It was 11pm and I was on a roll. Having prototyped my little circuit and transferred the mask onto a copper board, I was ready to create a nice permanent PCB version of the module.
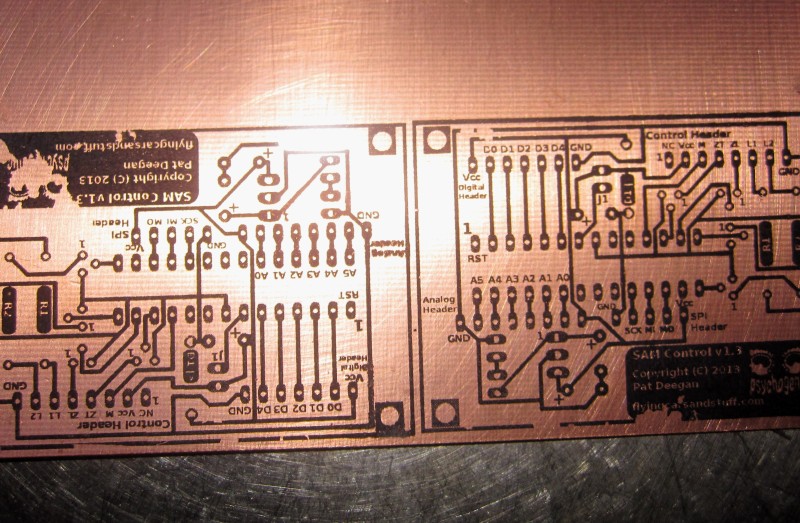
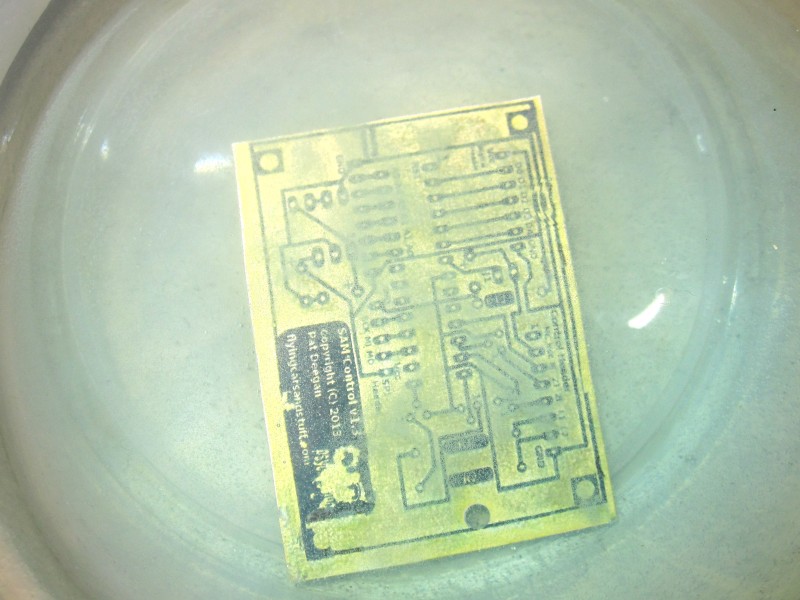
Toner (mostly) transferred to copper board
Far from perfect transfer, but enough to do the job. The only problem? No Ferric Chloride anywhere in sight.

Making your own etchant: Fun for the whole family!
Then I remembered I’d been thinking of switching to re-usable etchant, created on the bench using muriatic acid (the store name for hydrochloric acid, HCl, used for cleaning swimming pools). The hardware store wasn’t going to be very helpful in the middle of the night and I was about to put it all off to the next day when I realized I didn’t actually care about how the etching was done, so long as the unwanted copper was made to go away, and I had a dim memory of etchants made from common household items.
A bit of searching revealed a few pointers, the most helpful of which was by Steve Hobley. After a quick trip to the pharmacy, I had everything I needed in hand to do a little late night experimentation. The short version is:
- Equal parts vinegar and peroxide
- A small heap of salt
- Your masked copper board/soon-to-be PCB
- Optionally, a little heat to speed things up
and you’ll have a nice PCB in no (well, ok, in a bit of) time! Read on for pics and details.
Etching Experiment
The reactants in this process are both mostly water and very weak (vinegar is diluted to only 5% acetic acid and the peroxide is at 3%). I only had two small (5×7 cm) boards to etch, so I started with about 200 ml of vinegar and peroxide (in a plastic container, of course).
I put this container, “bain marie” style, in a pot of hot water on the kitchen stove and set it to somewhere between min and med to ensure everything would stay warm. After a little wait, I added salt pretty liberally (somewhere between a tea- and tablespoon) and stirred with a piece of wood until the salt was all disolved.
Greenish precipitate can soon be seen on the copper
I immersed one of the boards and greyish blue-green deposits quickly started forming on the copper, clouding the liquid. It was working! A small paintbrush was very useful in removing the precipitate from the remaining copper, without damaging the toner, to help the reaction keep moving along and stir the solution.
The liquid soon turned a nice shade of blue and bubbly, making the board a little difficult to see.
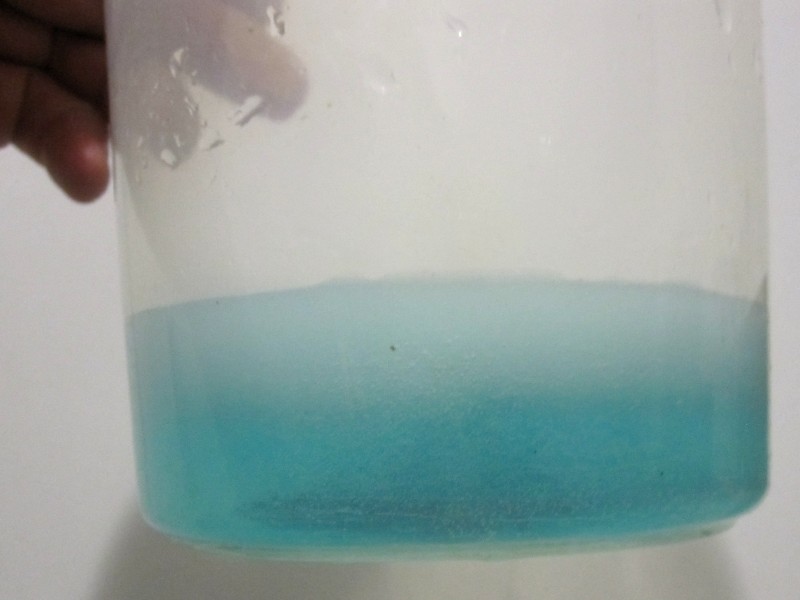
The homemade etchant quickly turns blue
The chemical reaction happens everywhere copper is exposed, but is more intense along the edges and it proceeds “inward” towards the centre (as usual). During the run on the second board, I brushed these slower zones about twice as often as the outer edges and it seemed to help synchronize the process a bit, so most of the board was done etching at the same time.
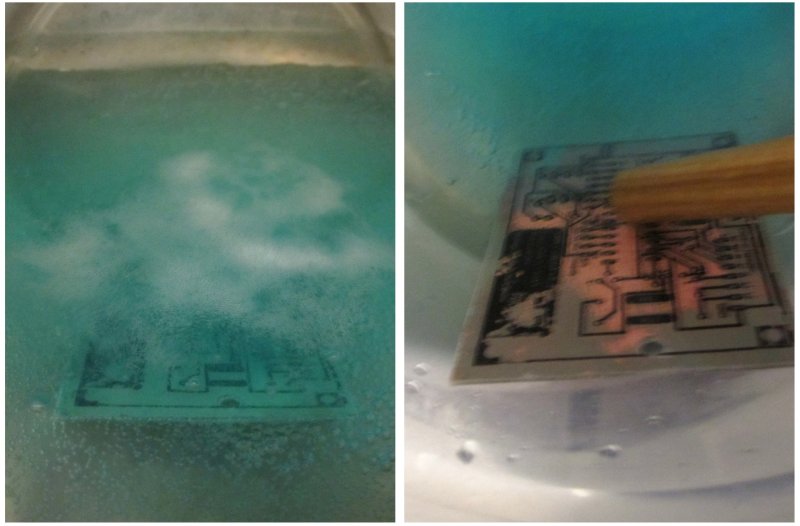
PCB reacting in solution, and halfway etched

PCBs etched with the DIY etchant, toner mask removed.
When the first board was ready, I rinsed it with water and removed the toner mask as usual. Since it had gone quite well, I tried to get the second board etched in the same solution. The reaction seemed to quickly fizz out, even through I tried to accelerate things a bit by turning up the heat.
I tried oxygenating it by stirring and, though it did seem to generate some chemistry (bubbles!) not much was happening on the circuit board. Adding salt had the same effect: bubbles and little else.
Ok, so the etchant was spent. I added equal amounts of peroxide and vinegar. I did this twice and it didn’t seem to have any effect… perhaps the reaction was simply going very slowly: the acid being diluted in a lot of water and byproducts of the first etching would obviously reduce the likelihood of a reaction occurring on the PCB.
In any case, it was getting late so I simply removed the board, neutralized the acid (slowly added baking soda until it no longer caused fizzing), put the spent etchant aside, and created a new batch. Remember, though the ingredients are all harmless on their own, the end product is not yummy at all–treat it as you would spent ferric chloride.
The second time around, I put in a bit more acid (vinegar) than peroxide and was generous with the salt. I also turned up the heat a bit and adjusted how I was brushing off precipitate, as mentioned above. I’m not sure which of these contributed to the change, but I found the second board etched faster, more evenly.
In the end, both boards came out a little more “crunchy” than I would like. This is partially due to the failing toner cartridge, on its very last legs in the laser printer, and because I let the etching go on a bit too long in both cases in order to remove straggling islands of copper that could very well have been left on the PCB without issue.
Still, both will amply do their job in my prototype. Just knowing I can always make etchant on the fly was worth the experiment in itself.

Final PCB, drilled and back-lit
For further details on the chemistry of the reaction and to see the page that got me started on this last night, visit the discussion on Steve Hobley’s “Still messing with forces I don’t understand — the formula” page.
Play safe, have fun!