
I love Adult Swim’s Rick and Morty so, for Halloween this year, I created my own version of Rick Sanchez’ Portal Gun–including a 3d-printed enclosure, printed circuit board, negative energy density tube/crystal thingy, wave file player and laser.
Portal Gun: from design to finished device
Here, I’ll go over the design and construction, as well as a few lessons learned along the way.
First off, to get an idea of what it looks like and how it works, check out this spoof advert/demo of the project:
Portal Gun architecture and function
In the video, you can see the essential elements of construction and function. In short, the device has two major modes: portal opening and universe selection.
A single control button is used that detects short vs long presses and reacts accordingly. The entire thing is run as a finite state machine. The original transition graph was:
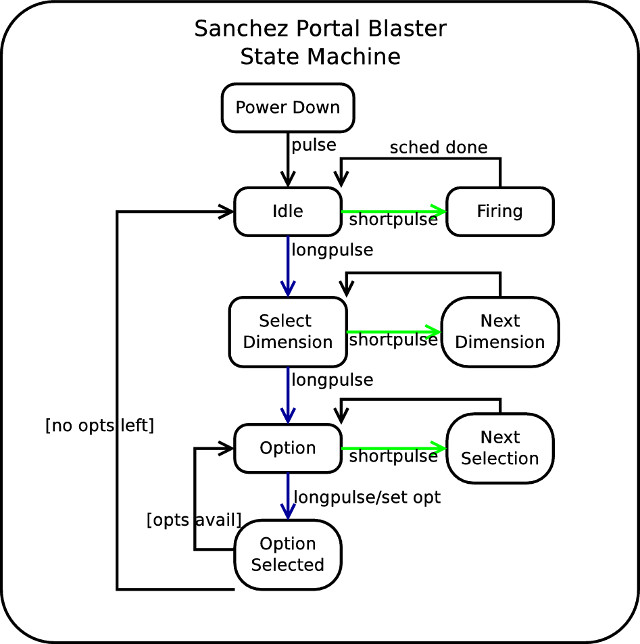
Portal Gun FSM
but I added a few things and simplified some others as Halloween got closer! In short, there are only three signals used throughout the system: the short/long button presses and a “schedule done” emitted by one of the async processes (light show or wave file play, doesn’t really matter which, I chose to piggy back on the lighting routine end).
The hardware function is split into 5 independent modules:
- LCD: support for 2 different types of display
- Wave file player: support for 8kHz stereo or mono files
- “Tube” lighting: 3 oscillating green and one “alert” red
- “Headlight” lighting: 2 green and one line laser
- Control Input: a pretty nice stainless steel MOM switch
all of which can run their own schedules/routines, and be told to sleep/wake by the hardware manager.
One of the options is to go into sleep mode, but the device will power down if inactive for a configurable delay (defaulting to one minute).
The portal gun is powered by a pair of AA batteries and everything runs straight off that voltage level, without regulation. In sleep mode, it consumes < 1 mA. In normal operation, power usage varies according to how the lighting is behaving while in idle mode (somewhere around 40-50 mA draw) and while it’s firing (all lights on/flashing, laser on, sound playing) that shoots up momentarily to about 170 mA.
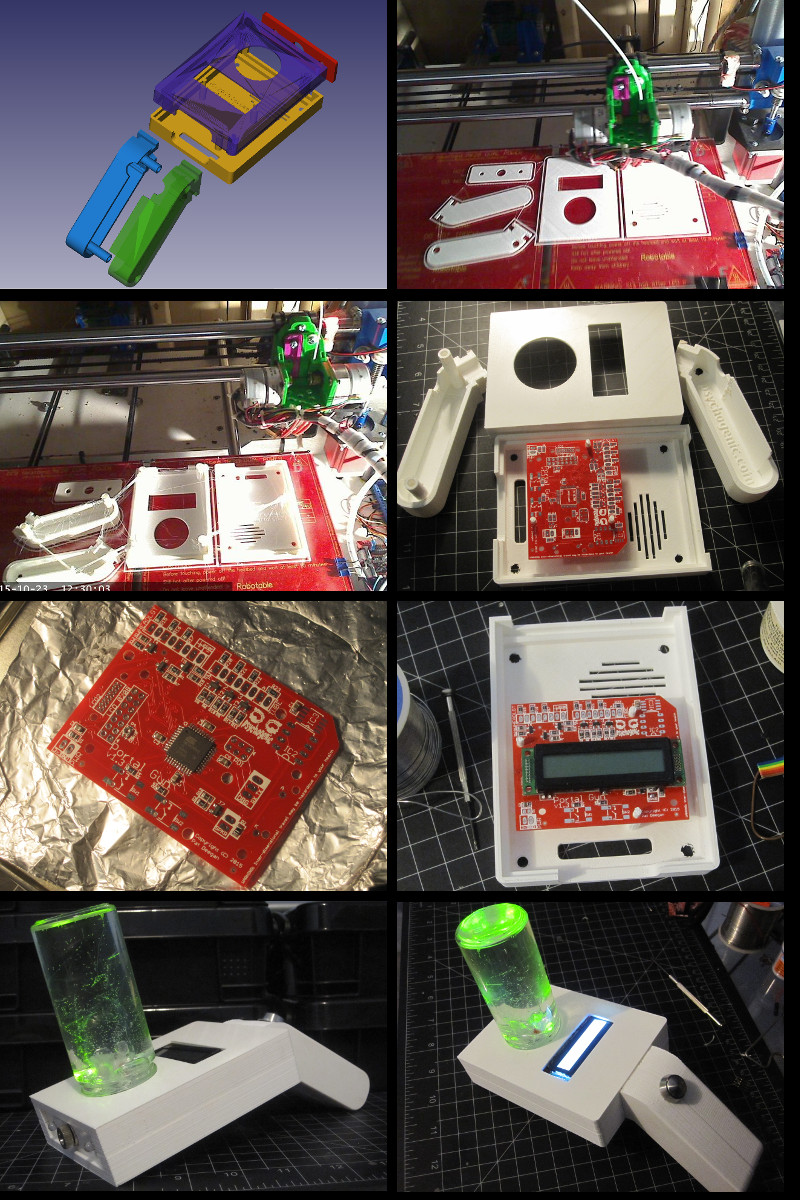
Construction
Construction of the portal gun involved designing a circuit and then building a case to hold it and support all the external components, as well as hold the battery.
This was my first CAD design since some minor initial testing, a few months back. Thankfully, FreeCAD is a powerful open-source and free program that allowed me to quickly come up with this:
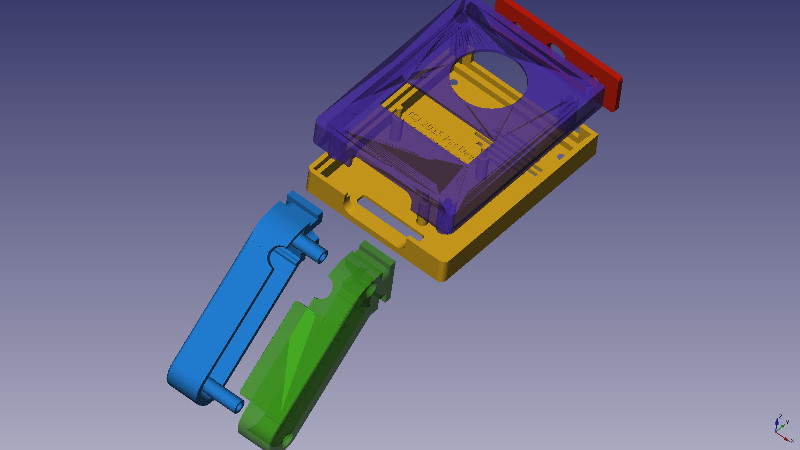
Portal Gun enclosure design
The five pieces lock together precisely and a notch in the handle/battery holder keeps the body and handle together nicely when everything is bolted together. From there, it was a question of turning the design from idea to reality. I looked into a few options here, but wanted something that would be quick and, ideally, local. For that 3dHubs to the rescue!
3D Hubs allows you to find locals that offer 3d prints. I don’t know if it’s always as smooth and all-around awesome, but I wound up working with JF Payeur’s hub and was more than satisfied with the result.
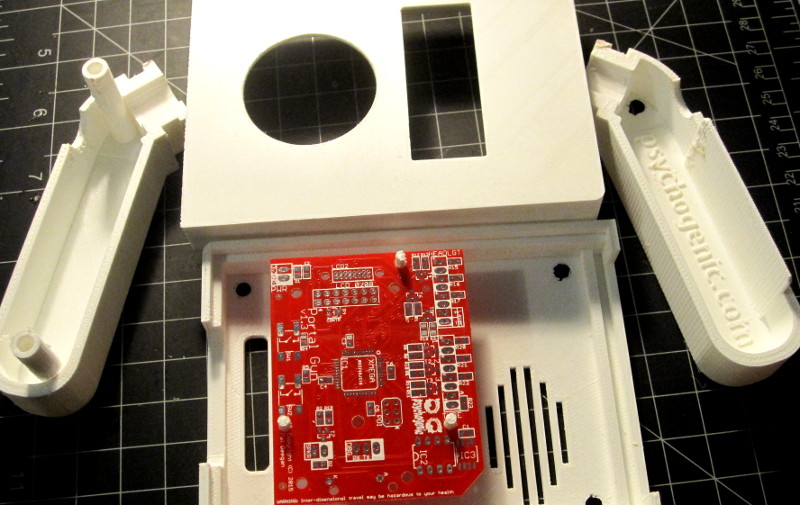
Once I had the case on hand and knew the PCB would actually fit in nicely, I populated the circuit board.
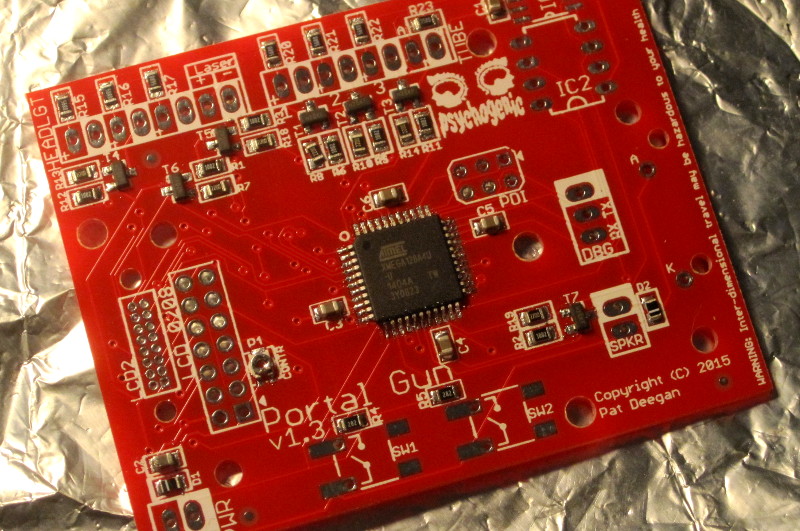
The circuit is relatively straight-forward, basically just an MCU surrounded by a bunch of mosfets to drive the lighting and speaker, plus the support for two types of LCDs and a sprinkling of protection diodes and bypass caps. I also have a few extra components laid out, there, that I didn’t have time (or need) to use right away (e.g. like external flash memory… I used an xmega128, so had tons of room for my wave files right in microcontroller).
The tube itself was made using plastic resin and LEDs poured into a suitable container, along with extra plastic for effect. Watch the video above to see the neat result with the LEDs pulsing.
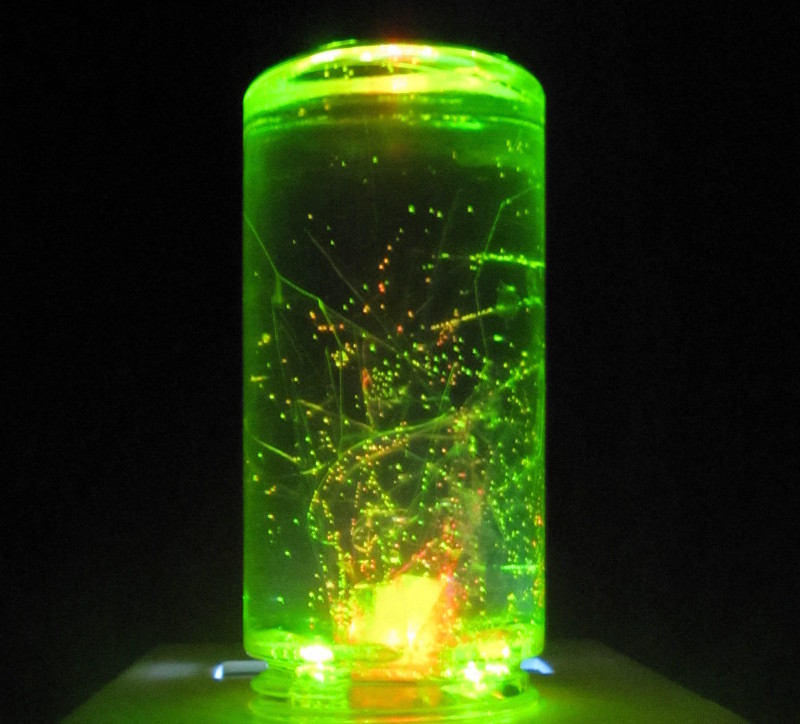
Not too bad for a dollorama spice bottle :)
Construction itself involved creating a bunch of headers to tie everything to the mainboard. Not my favorite part, but at least it kept things more flexible than soldering directly to the PCB.
Finally: stuff it all into the box,
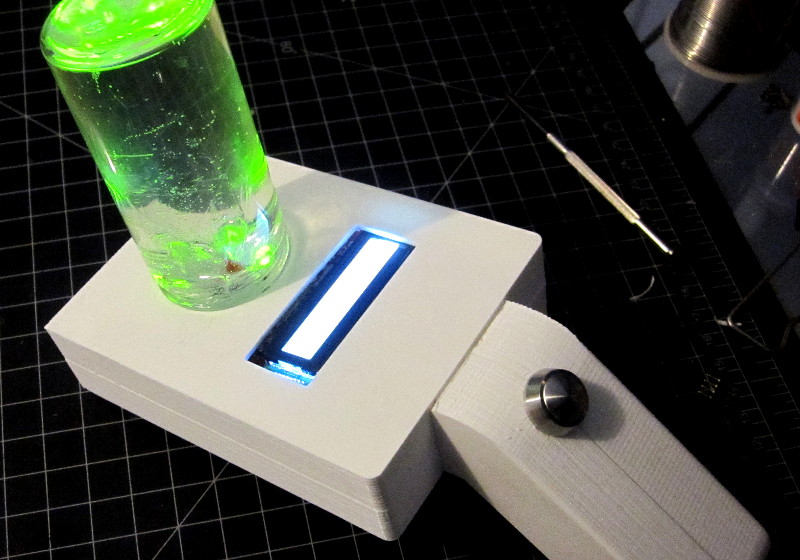
Final Assembly of portal blaster
and take it out for a spin

Rick Sanchez meets beings from other universes
Post-Mortem
Most of the lessons learned during this project involve the case design. The most important of these are:
- Leave more tolerance between parts that fit together;
- Don’t count on small plastic extrusions to hold anything–they just snap off (e.g. my PCB sitting nicely on the pegs in the picture further up… yeah, that didn’t last);
- Make the enclosure bigger than you think you’ll need–a few cubic cm of plastic can make your life a lot easier (e.g. I had to swap out the speaker for a larger one and that caused me trouble);
- Don’t be too liberal with wiring: too much is as bad as too little, when you’re trying to stuff everything into a box;
- Buy more headers, especially if you design such that parts overlap (e.g. the LCD’s constrast trimmer pot is… beneath it! Not such a big deal when the LCD is removable, but I ran out of 1.27mm headers and yeah, not so much fun);
- Make the damn batteries easily accessible!
So, a few good lessons learned, and at least as much fun making the portal gun as I had using it on Halloween (and every day since ;-) ).