I went out to do a beta demonstration at a client’s office, last Thursday, and brought along the prototype circuit boards as well as a small variable power supply. As I was setting up and pulled out the power supply–a functional but somewhat shoddy little black box with red and black alligator clips–I remarked that it had been one of my first useful electronics projects. I made it over a decade ago and it’s served to develop almost all my projects since, unlike the guitar distortion and other little circuits I was building back in the day.
It wasn’t too pretty… a simple LM317 circuit with a pot to tune the voltage–so everytime I hooked it up I’d need to set the voltage with the help of a multimeter. Another downside, which I’d pretty much forgotten since most of what I do involves microcontrollers and very small loads, is that it had a very limited capacity: a whopping 100mA. So limited, in fact, that last night as I was playing with a few servo motors I actually managed to let the magic smoke out and killed it.
I’d been thinking of getting a real bench supply, with readouts, constant current settings and whatnot but just never got around to it. Then, suddenly, I was without power. Rummaging through the parts I had on hand, I came up with a back-of-the-envelope circuit that would have a little less flexibility (I’m all out of LM317 variable voltage regulators) but provide a lot more ease for the types of projects I do. I figured it would be a quick little hack, so didn’t bother to pull out eagle and design a PCB–I just drew something up with pen and paper, all old-school like.
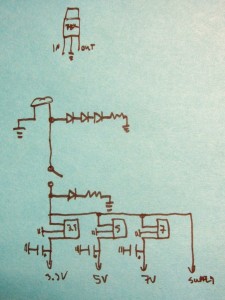
Circuit Diagram
The project is designed to accommodate any wall-wart supply between around 9V and 16V, with a (relatively) standard 2.1mm jack (positive centre). The power supply is tied to three voltage regulators in parallel: a 3.3V (78M33), a 5V (78M05) and a 7V (a BA70BC0T in this case). These can supply between 800mA and a full Amp, which is usually much more than I need. There are–optional–caps between each output and ground, to smooth any ripples. I used 220uF electrolytics–make sure you tie the “-” side to ground if you use these.
There are two sets of LEDs, one to indicate that we’re plugged in and another that’s only on when the switch is closed. The reason there are three LEDs in line for the supply indicator is that I wanted to maximize the variation in brightness according to supply–though the variation in lighting with LEDs in subtle, they will be dim for a 9V supply and at maximum brightness around 15V. This is because, by using LEDs with a large voltage drop (2.7V for each of these blue guys) I could select a small resistor and have a wider variance in current between 9V and 16V. The actual values for the resistances depends on your LEDs and power supply–see the note at the end for details on this stuff.
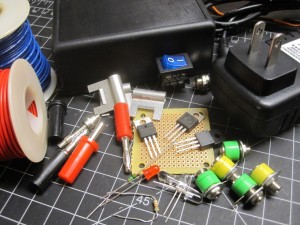
I started by collecting all the parts I’d be using, to make sure everything was set. I like to use banana jacks because they’re easy to switch around, my breadboards all have banana jack connectors on board for power and because the name banana jack is funny.
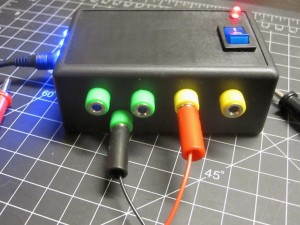
I didn’t have all the colours I would have liked available, but I decided to use green for the “digital” voltages (3.3 and 5V) and yellow for the “unsafe” voltages (7V and supply–i.e. whatever is plugged in). For ground, I had to settle for green as well, but decided that it’s unique placement would help as a mnemonic.
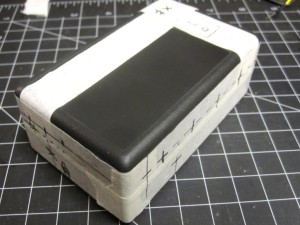
I applied masking tape to the project box to help in marking it for drilling. I evenly spaced the holes for the various supplies and set the ground jack hole apart on a bottom row. Supply LEDs and supply jack on one side, switch and power LED on top.
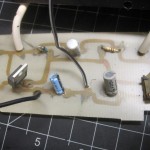
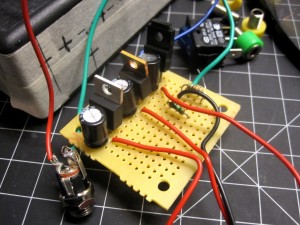
I placed all the components in a manner that reflected the circuit diagram, on perfboard.
I was hoping to use simple solder bridges between the pads but this was an abysmal failure. I wound up needing to add wiring pretty much everywhere. To someone who’s become accustomed to printed circuit boards, the mess of tangled leads and gobs of solder was discouraging. No wonder I used to find electronics pretty tough: this was difficult and confusing. It’s a miracle anyone ever managed to make a radio, nevermind a computer!
I’m sure others would do a much better job of this, but my wirewrap tool vanished long ago and I have to say that after this I won’t be doing too many more perfboard projects. Still, even with a PCB there would have been a good deal of wiring to do between the power supply, outputs, LEDs, switch… I’ll take it as a skill-building experiment ;-)
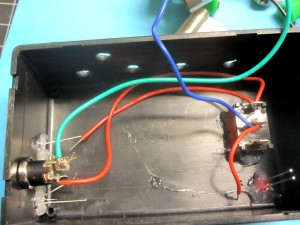
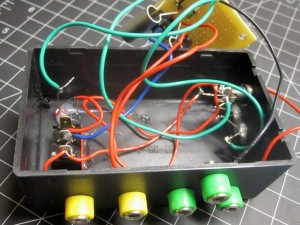
After drilling the project box as needed, I placed the LEDs and switch and affixed it all with a bit of hot glue. After that, it was a simple matter of routing each wire to the right spot and putting all the connectors in place.
Once everything was done and all connections checked, I managed to get all those wires packed into the little black box and fired her up. Actual measured voltages from left to right: 3.34V, 5.08V, 7.12V, 12.52V. Sweet!
One note: I hooked up the supply output directly to the supply input which means that the jack on the extreme right (supply) is powered up as soon as I’m plugged in. It would have been wiser and provided a more uniform interface if I’d tied it to the other side of the switch and I’ll probably get around to fixing that in my copious free time.
About LEDs and resistors: a mini-tutorial
The resistance to use with LEDs can be confusing until you actually grok it. There are resistance calculators online, but once you get it you’ll quickly forget them. Ideally, you should have a multimeter with a “diode” setting–otherwise, you can use the datasheet for the LED but a multimeter that allows you to check diodes is pretty nice especially if, like me, you have a tendency to forget which of the leads should go to ground (hint: the short one).
You need three numbers: the voltage drop across the diode, the maximum current the LED can handle before it eventually goes “poof!”, and the voltage you’ll be supplying.
If you have a “featureful” multimeter, you can set it to diode mode and turn it on. Mine displays something like 3.2V when nothing is connected. If I touch the leads on the diode the “wrong way” it just stays at that number. When the ground lead is actually tied to the negative side, the displayed voltage will go down and the LED may light up a bit. That new voltage, around 1.7 for “regular LEDs” up to 2.7V for the blue one I was using, is the voltage drop for the LED.
What’s magical about diodes, when current is flowing through them, is that you can think of that voltage drop as being eaten up. So when it comes time to do simple Ohm’s law calculations (V = IR), you subtract the voltage drop from the supply voltage as if it just wasn’t there for each diode/LED in the line.
Since we know how much current we want to let through (the maximum LED current, say 20 or 25mA if you don’t know, or check the datasheet), and we know the voltages involved (supply and drop), the resistance is simply R = Vadjusted / Imax. To take a concrete example, assume you’re building the circuit described here, and that you have a 15V supply and are using three blue LEDs like mine, with a 2.7V drop (each). We’ll say the maximum current, Imax, is 25mA. In this case:
Vadjusted = Vsupply - all the voltage drops
Vadjusted = 15 - (2.7 + 2.7 + 2.7)
So, from the resistor’s perspective, there isn’t a 15V supply: it’s only 6.9V! Then, whip out Ohm’s law and figure out the resistance to let Imax (25mA or 0.025Amps) through:
R = 6.9/0.025
R = 276
In real life, the closest resistance you’ll find to 276Ohm is 270, which will be fine.
And that’s it!
This also explains why I used the three LEDs in series. Because of the large voltage drop (2.7*3 = 8.1V) for the three diodes, this means that, to the resistor, a 15V supply looks like 6.9V and a 9V supply looks like only 0.9V–so there’s more than a seven-fold increase in current through the LEDs between 9V and 15V (7.67 times more current, to be exact).
If I’d used a single regular red LED, I would have needed a larger resistance (around 500Ohm). Though the current would of course increase between 9 and 15V, that increase would have been of only a factor of ~1.8. I leave figuring out the details as an exercise for the reader ;-)
Hope you enjoyed and that this might be useful. As always, please get in touch with any questions/comments.
