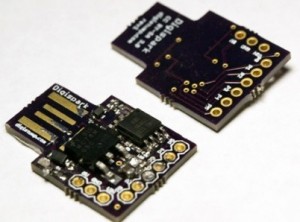
A few months ago, I funded my first kickstarter project for production of the Digispark: a tiny (less than a square inch) Arduino-compatible device based on the AVR ATtiny85.
Though I received the occasional progress update email, I pretty much forgot about the Digispark. Until last week, that is, when I received a small package containing three of the devices. Huzzah for kickstarter and Digistump (the creators of Digispark)!
Here I’ll go over a few snags I got over to get started, my preliminary impressions of the device, and a few hints on using the ‘sparks.
A rough start: Problems with Linux
After a couple of days of anticipation, I cleared some time to begin playing with my new toys. My first interaction with the spark was something of a let-down: though the device powered up through USB and seemed to function, attempting to program anything onto HowTo it would consistently fail to complete:
Erasing the memory ...
erasing: 66% complete
Error erasing: -1 >> Abort mission! error has occured ...
Please unplug the device and restart the program.
As recommended by the docs and forum posts, I tried various USB wires, using a USB hub, different USB ports and different machines (though all are Linux systems)… to no avail.
A particular line kept appearing in the system logs at the point of failure:
usbfs: USBDEVFS_CONTROL failed cmd micronucleus
           rqt 192 rq 2 len 0 ret -84
Not an overly informative error message, but it did indicate that the problem was related to micronucleus. Digisparks don’t have all the capabilities of their big brother Arduinos, and USB communication is handled in software. The micronucleus project hosts both the bootloader firmware (which includes USB comm) and cheap nba jerseys a program that does the actual uploading of code to the ATtiny85’s flash. It is this uploader that was generating the errors. Since all my computers are Linux machines, I couldn’t test whether the issue was OS-specific. In any case, if it says “Arduino compatible”, I expect to be able to use it under Linux…
Still, in order to tell if the problem was with my hardware or software, I found a dual-boot Linux/Windows system. For Linux, the problem was the same. Windows, however, produced output that included:
>> Eep! Connection to device lost during erase! Not to worry
>> This happens on some computers - reconnecting...
just around the point where the error was killing the process for Linux.
With a little digging around in the micronucleus-t85 sourcecode, I found how Windows was managing this feat and (by simply adding code to handle the -84 USB error code in the same way as for Windows) got things working under Linux. The patch I created is available here, if required. Bluebie, helpful maintainer of micronucleus-t85, quickly merged my pull request and there’s a good chance the Linux fix will be in place by the time you read this.
So, with a way to program the device I finally got my own Digispark blinkenlights things test program uploaded and working. Yay! The two most important things to remember when using Digisparks with the (Digispark-version of the) Arduino IDE are:
- set the Board and Programmer to “Digispark”
- click Upload before you plug the device in
Hardware
 The Digispark is little more than an ATtiny85, a voltage regulator and a power LED, on a sliver of PCB that incorporates USB-connectors on-board.
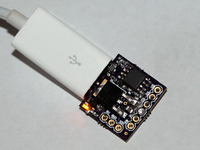
There are Design some inconsistencies in the manufacturing process that lead to some of the devices fitting directly into USB ports, while others won’t. You probably want to use a hub–or at least a USB extension–anyway so it’s not such a big deal.
I like having the 7805 regulator because it means you can power the device from sources up to around 35 Volts (I keep it lower than that, both to be safe and for pratical reasons–all my power supplies are for 15V or lower).
The downside there is that voltage regulation isn’t free, so powering from anything less that ~6.5V will have the digital pins output a <5V for HIGH. This follows the Vout – Vin curve from most 7805 device spec sheets I’ve seen. Below about 4.6V things start getting really fuzzy, and I’ll be sticking with supplies of 6V or more.
There are 6 pins available, all of which may be used for digital output (though one is tied to an LED, and just which one depends on the version). Three of the pins can be used for PWM and two for digital-to-analog input.
With the bootloader in place (which handles programming, running user code and USB comm), you end up with about 6k of free space (6010 bytes, to be precise) for your programs. Pretty tight, but enough for many applications.
Software
Not all the standard Arduino functionality is available and, as of this time, some of the differences force you to code a bit wholesale mlb jerseys differently. For instance, there is no built-in SPI support (though you should check TinyWireM for this kind of thing), and two-way serial communication needs to happen through the “DigiUSB” device (rather than Serial).
DigiUSB is based on (a non-standard) version of the Arduino Print class, rather than Stream. This means that:
- not all the Stream methods you’d have with Serial are available (no readBytesUntil(), no parseInt()/parseFloat() etc)
- the print()/println() methods return void rather than a size_t, so I’ve already encountered situations where I’ve needed to add conditional compilation, like:
#ifdef MY_USING_DIGISPARK_FLAG
  #define PRINT_AND_RETURN(msg) \
    DigiUSB.print(msg); \
    return 1;
#else
  #define PRINT_AND_RETURN(msg) \
    return Serial.print(msg);
#endif
And this is but one example. But, for the most part, you can treat the Digispark as any wholesale nba jerseys Arduino. Where there are differences and limitations, the examples and community Brunch will be of great help.
The Digispark version of the Arduino IDE contains a good number of examples for everything from blinking LEDs to writing EEPROMs and reading keyboards.
Spark extinguished
After a bit of experimentation, my test device disappeared.
It simply was no longer visible from my development system. Though it powered up and I could see it was running setup! the last program I uploaded, it caused no reaction whatsoever when plugged into the USB port. My two other Digisparks being detected and programmed correctly, it seemed the problem was either with the bootloader on the ATtiny85 or the hardware itself.
Because the reset wholesale nba jerseys pin is disabled during setup (at time of manufacture), the only way to talk directly to these AVRs is to use “high voltage serial programming” (HVSP). I have an old STK500 from pre-Arduino AVR programming days, so I hooked everything up to attempt to dump the flash and read the fuse settings, in accordance with Bluebie’s tips.
The bad news is that avrdude, the program used to control the STK500, doesn’t support HVSP on old version 1 STK500s. The (relatively) good news is that the problem wasn’t with the bootloader after all. Still, I’ll eventually see if creating an HVSP fuse resetter, so I can use the STK500 + He avrdude in “regular mode” in such cases.
After failing to speak with the ‘tiny85 using avrdude, I looked into the chip’s hardware. Seems I somehow managed to blow D1, a diode used to protect one of the USB pins. I’m not certain how it happened and replacing the SMT component will be a pain, so for the moment I’ve put it aside and am using one of the other modules I received. So far, only that first Digispark has died.
Conclusion
All said, I really like these micro machines. They have enough juice for a number of projects and are small and cheap enough to leave embedded pretty much anywhere.
I’ve had a little project in mind for a while–an atmosphere/plant illumination system–and think I can use a Digispark to control the whole thing. I’ll be posting more here as I progress.
Final note: it took a little while, but Digistump is now shipping ‘sparks within 2 days. Good job on all fronts, guys!
